Showing posts with label crayons. Show all posts

Friday, December 14, 2012

Hidden Message

What, a new post?! So soon after the last one??

It's surprising how much time one has during break.

Like time to make wreathes!

My mother and I took some stale popcorn, old cranberries, and a wreath form. Tediously, we strung the popcorn and berries onto floral wire type things.

Considering that wreaths can go for $50-more at Hobby Lobby this was a cheap alternative. Not only did it look cool, it would be a pretty bird feeder.

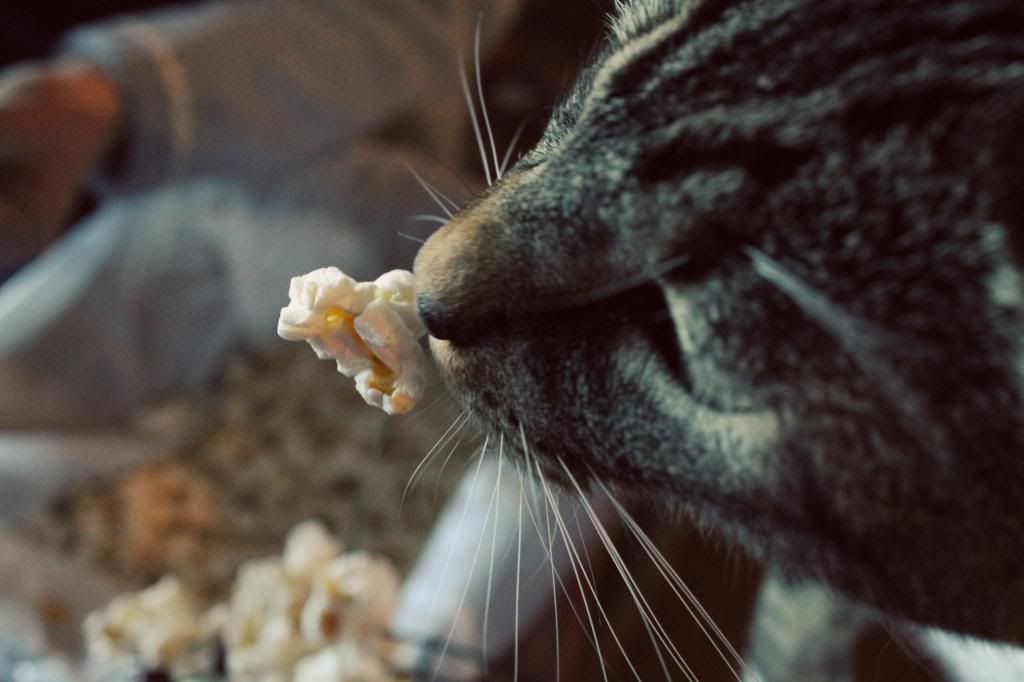
Foster was pretty curious ;)

The wreath was delicately illuminated by the winter sun; I tried forever to get a good picture of the final wreath but didn't come up with much.


Anyway! Throughout the semester I have taught some of my friends my crafty ways, evident by this amazingly funny t-shirt my friend made for her boyfriend.

It's modeled after his high school t-shirt; a high school that he adores very much.

I was flipping through my photos, found this, and resolved to be crafty now that I had time to. So first order of business was to try this crayon tutorial I had seen on Pinterest.

Yes, it took a while, but I am finally into Pinterest.

Anyway, the tutorial called for white crayons and watercolors. What do you do when you don't have watercolors?

Grab some old calligraphy ink and see what happens! Of course. Who needs rules anyway?

I mean look at that color. I'm not into calligraphy like I used to be, and I wanted to put the beautiful ink to some use.

I did have a white crayon! Which is certainly helpful.

Step One:

 Write your message with white crayon on the white page. It's a little tricky to do seeing how you can't really see what you're writing....but just, you know, guess. ((if you think I'm bad with being specific you should see me cook. 'oh that kind of sort of looks like a cup, right? and like what happens if I put in 2 tablespoons instead of one?))

Step Two:

 Paint over said black message with watercolor/watered down calligraphy ink/watered down paint/really whatever you feel like trying.

Step Three:

Wish you had watercolor.

Step Four:

Figure since you broke the rules it won't work, through some watered down paint on your picture....nothing happens.....walk away wishing that younger you had been into watercolor rather than calligraphy.....walk back to put everything away ONLY to discover that all it took was time, and the white was showing through the paint.

If you do use paint make sure to dilute it well. Save yourself my indecision. 


So, yeah. This tutorial required me to be slightly more artistic than I really am so I wasn't blown away by the results, but it's a fun, easy tutorial.


Stay tuned to see how quickly and creatively my boredom turns into craftiness!

Thanks for reading :)

Thursday, August 2, 2012

A Summer Scene

More melted crayon art! As promised ;)

So recently I got four boxes of crayons, making good use of the back to school sales that meant each box was 50 cents.


I also had two small canvases to use. One was covered in a pretty bad painting I had attempted-- I told you I always wanted to be an artist. 

The other canvas was blank, just waiting for the possibilities to be realized. I had recently stumbled upon a cool paper flower tutorial. I posted a picture here a while ago-- I tried it, but then wrote the flowers off as just another tutorial that didn't work out.

Well, the more I looked at the paper flowers, the more I liked them. Also, I found a cool melted crayon artwork that used greens as a nod to grass. All those things combined together yesterday to create another melted crayon artwork.

My cat was very curious ;)
At first I toyed with the idea with lining crayons at both the top and bottom of the canvas to create both the sky and the ground. I realized, though, that the canvas was too small for both the blues and the greens and opted out of the sky.

I decided to try and alternate the heights of the crayons. Out of the four boxes of crayons I could barely cover the bottom of the canvas with greens, yellows, and browns. I placed the paper flowers on the canvas to approximate their placement.

Next, I headed outside. This time I tried using a hairdryer to melt the crayons. The trick with this idea was to prop the canvas up like this, melt the crayons, and then flip the canvas so that the wax appears to grow up.

The hairdryer didn't take near as long as I had feared. I also didn't have the problem of crayons slipping out of the glue like I did last time.

Melted wax! The browns were pretty dark-- if I had more greens then I would have nixed the browns.

Volia! I tried to vary the wax dripping lengths...if that convoluted sentence made sense. I wanted to put the flowers at the top of the wax drippings, like flowers on a stem.


Here it is! I like the way that the greens all blended together. I'm not sure if I like the flowers... I haven't glued them on yet so I might make some more. I'll post how I made the flowers later-- haha you, my reader, might have better luck! They just look so cool on the tutorial...

A close up of my music flower!

As always, thanks for reading! I had like a flip-out moment halfway through writing this post when I thought all the pictures-- which took me like 30 min to upload-- had disappeared. Luckily for me, they hadn't!

Now back to my Friends episode....:)

Thursday, July 19, 2012

A Walk in the Rain

Unfortunately not literally. There is no rain to walk in, here in drought-stricken Arkansas!

Figuratively speaking. Being the crafty (almost) person that I am, I have seen tons of crayon-melting art/tutorials. While I liked the burst of color that the rainbow ones offered, I had a special place in my heart for the ones that went one step further. I loved the artworks that used the crayons for a specific reason. My favorite was one that used blue tones to create a beautiful rainy scene out of the melting wax.

I've always wanted to try and create my own work of art out of crayons. Yesterday I set out to make that dream a reality. I found a small canvas I had bought a month ago for three dollars, and pulled out a huge bag of half-used crayons. I was able to pull out enough blue out of this bag of mystery to line the top of my canvas.


Because I lack artistic ability, as mentioned before, I printed out a silhouette of a couple standing underneath an umbrella. Cutting it out, I mod-podged (yes, it is a verb!) it onto the canvas.

Now, a lot of melted crayon artwork has a nice little line of crayons, with labels proudly showing. However the gently used crayons I found had messy, half-torn off covers on them. Also, my mother had labeled them years ago. So I decided to tear off all the labels to try and maintain some sense of uniform-ness. 

I tried to just tear the crayon labels off by hand but after spending what felt like hoursss on that, I made use of a tip I had saw online. I used my x-acto knife and just sliced those babies off! It went a lot quicker after that.


 Enter, the glue gun of death. Probably older than me, this glue gun reached dangerous temperatures insanely quickly. I somehow managed not to burn myself while I glued the crayons onto the top of the canvas.

Then I headed outdoors, just in case of flying wax. Now, most people use hair dyers to melt the crayons. I read lots of horror stories-- oh it took almost three hours just for them to melt!-- online so I decided to improvise. My mother makes cards, and had the coolest little gadget; the heat ray gun of death. I don't have a picture of it, but it's a small little tube-like object that blasts out heat like you wouldn't believe. 


This heat ray gun of death caused the crayons to melt with seconds of me turning it own. It was crazy how fast they would melt. I tilted the canvas this way and that, experimenting with the dripping wax. I used a plastic knife to help direct the melting crayons. A couple of times the crayons got so hot that they slipped from their hold and slid down the canvas. To remedy this I laid the canvas flat and directed the heat right on top the crayons to help melt them in place.

And volia! The final result :) It didn't turn out like I had imagined it, but still, I like it. Not only is it romantic and blue it was also cheap to make and a beautiful (in my mind) work of art!