Showing posts with label crafts. Show all posts

Sunday, July 3, 2016

The How and Why of Bullet Journals


I'm not sure how it started.

Knowing me, it was probably caused by too much time on Tumblr. Bullet journals rank up there with low-calorie-decadent-desert-recipes-but-for-real-it-tastes-the-same (not), mason jar recipes, and putting glitter where it doesn't belong (aka fads that are everywhere on the internet).

And just like breakfast-oatmeal-that-tastes-exactly-like-cookie-dough-but-with-like-no-calories! I didn't expect much from the bullet journal. My handwriting has never been consistent, choosing to oscillate between pretty cursive, and what you would get if you gave a chicken a pen. I'm a huge fan of the idea of organizing and planning, but when it comes to keeping up with planners...well not so much. I designed my own calendar that ran from August to February which I used and loved. I was able to create layouts that I personally thought were gorgeous-- I did a fake Polaroid spread, an autumn leave month...


But eventually I lost that spark of inspiration, didn't want to create more layouts, and thus my calendar was dead. I wanted something that lasted, some method that helped me get everything done, but also something that kept my (admittedly short) attention span. Your run-of-the-mill-bought-it-at-Target planner just wasn't going to cut it for me. I wanted the freedom to individualize it however I saw fit.

So I decided to give bullet journals a go. A bullet journal is very loosely defined method of planning which typically involves you, a pen, and a blank journal. The core idea (one which I don't even follow....thus the 'loosely defined' caveat) is to have a planner where you can, at a glance, see what tasks you've complete, what tasks are left, and what events you have, all coded with different symbols.

Personally, I just use open box icons to list my to-dos, purely for the satisfaction of filling them in afterwords. ((True story, sometimes, if I just did something I forgot to put on my to-do list, I'll write it out just so I can fill in the box...))

I did not want to invest much money in this idea when I first started, so I opted out of buying a more expensive journal that most people use and love. Instead, I went to Walmart and found a little black artist journal/book. My main requirement was I wanted something with blank pages-- so that I could draw whatever layout I wanted without the restriction of pre-existing lines.


My Main Spreads:

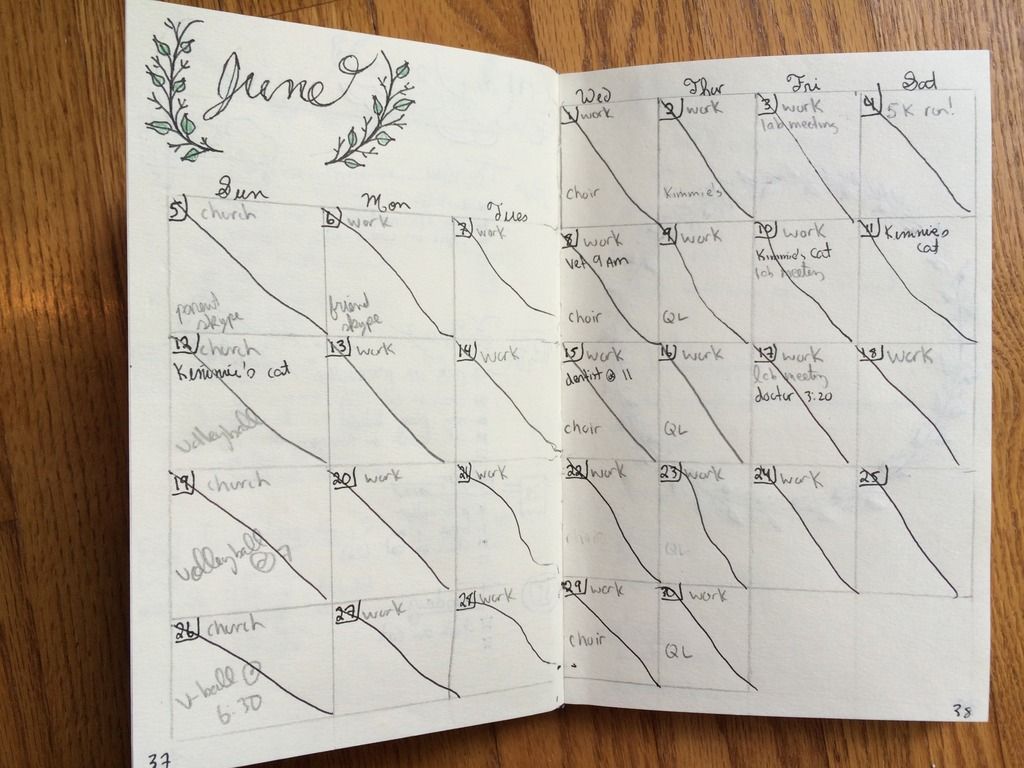
Monthly Spread
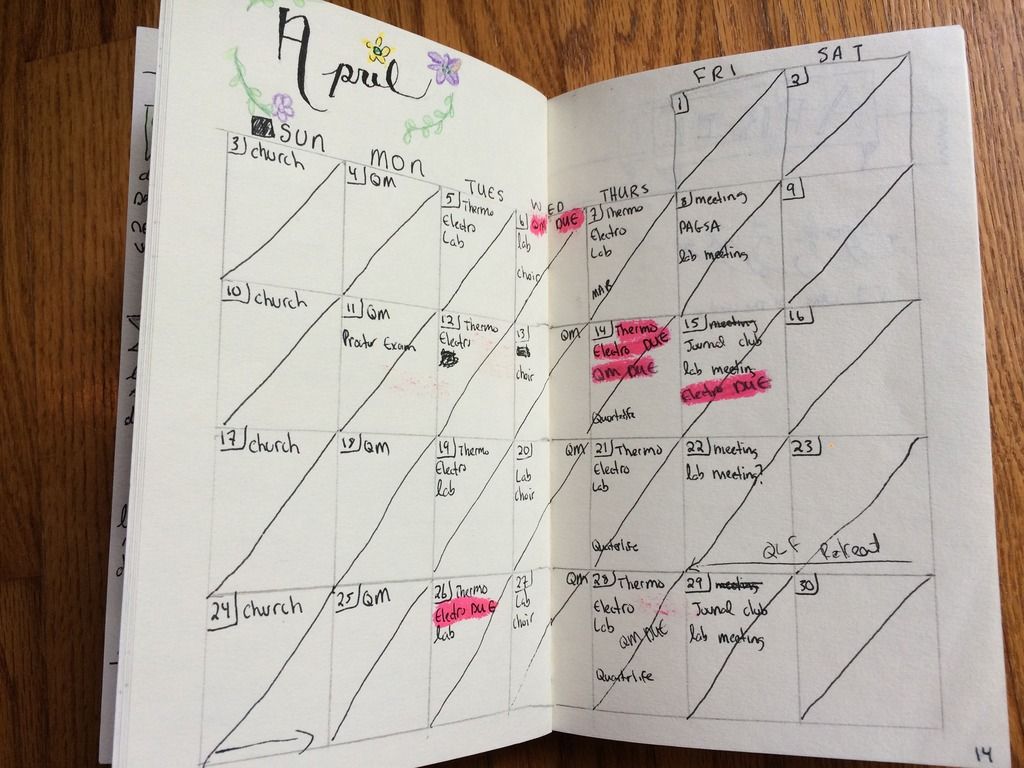


This spread tends to take the longest. For some months, I measure everything and then do some math to figure exactly how big the boxes can be. For June I just winged it. I love this traditional spread; as you can see, during the school year I would highlight when homework was due/when exams were.
I also love drawing little designs for the titles.

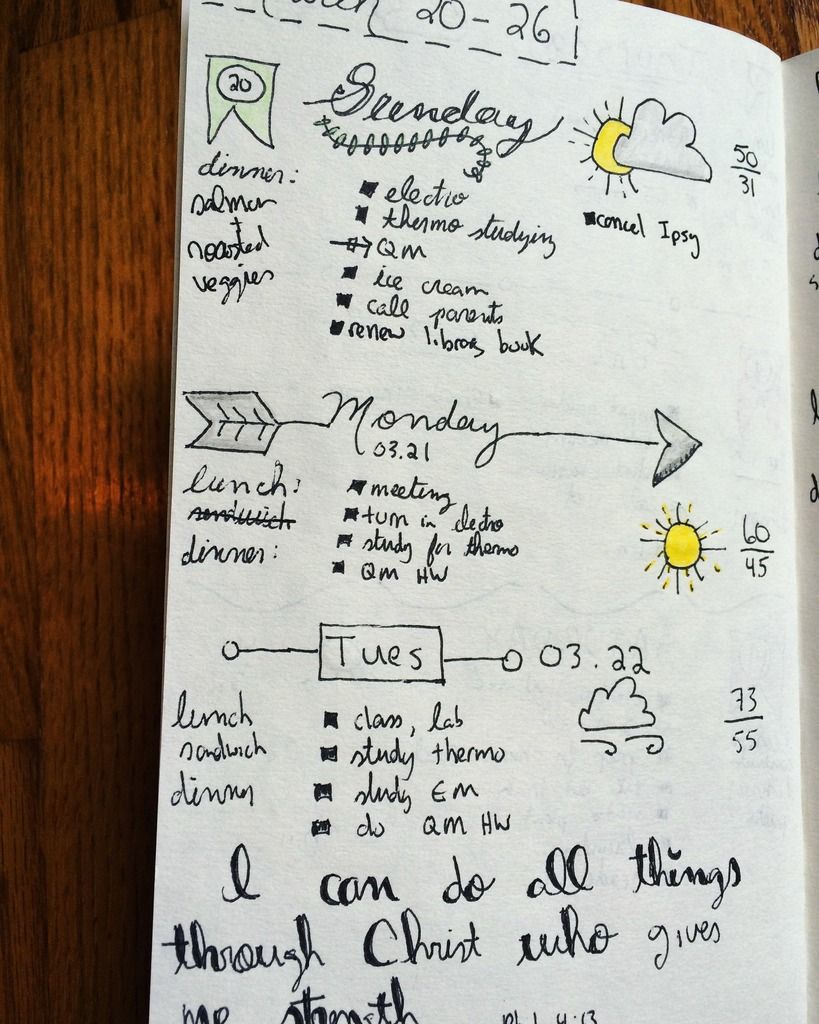
My Weekly Spreads:
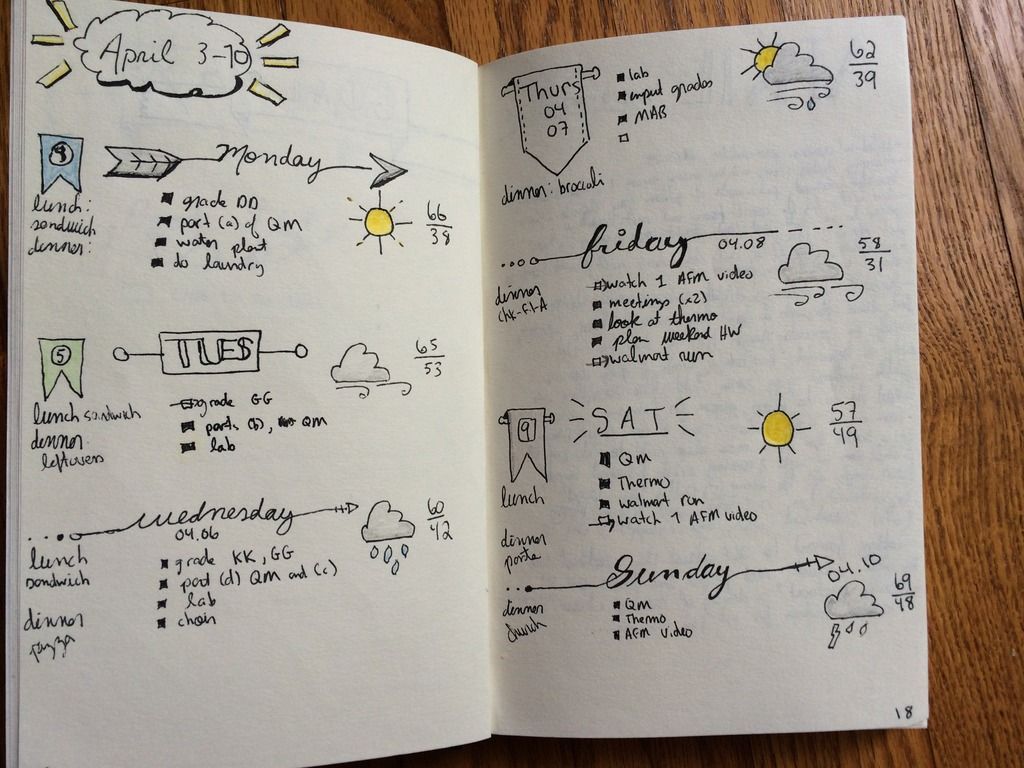


This is crucial for all those little tasks you want to get done in each day. Recently, I've been putting any events I have as little dots. The act of writing down the tasks, while it might seem insignificant, has been shown to dramatically increase the likelihood I'll get it done in a timely manner. Sometimes the tasks are important (schedule dentist appointment), sometimes they're small (water plant), but the sense of satisfaction after filling in all my boxes is real.


Meal Planning
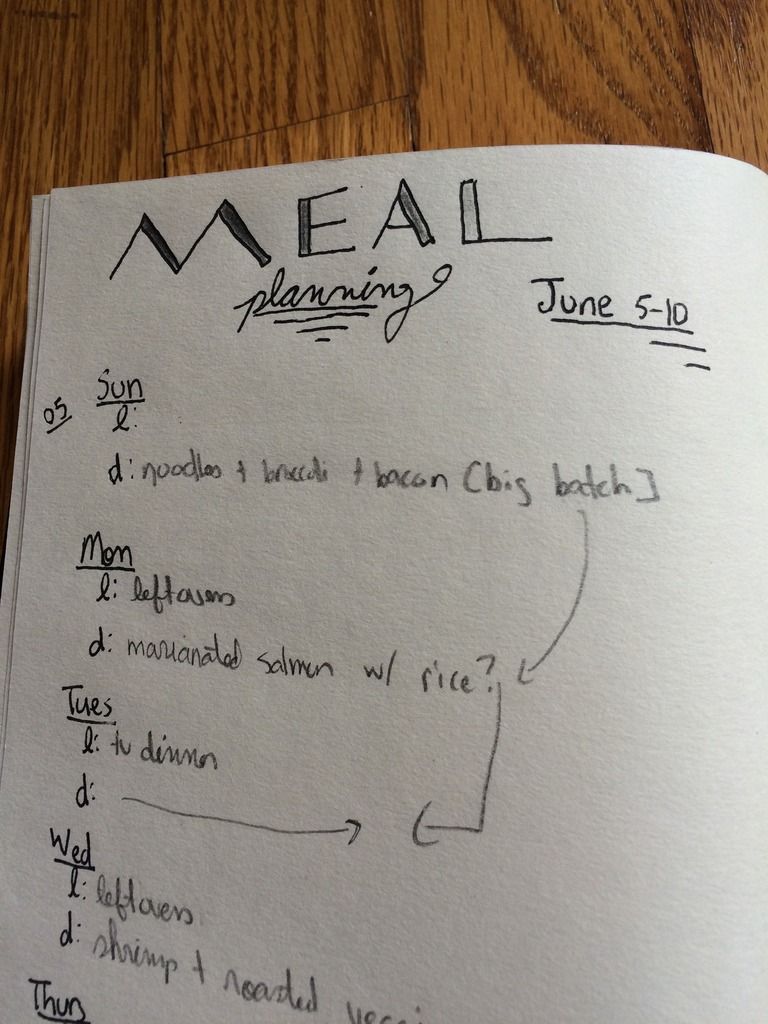


Pro tip: do your meal plan in pencil. Something invariably manages to come up and I have to shift my dinner plans around. Previously, I crammed my meal planning onto my weekly spread, but I realized it needed its own space. Now the struggle is to come up with a meal plan that I actually follow. This past week I wrote down a nice little meal plan and ended up not following one word of it.


Memories

One of my favorite aspects of my bullet journal is that it holds everything in one spot. Not only my to-do lists/calendars, but also a minimalist journal. I try and write just one line per day-- see aforementioned note regarding short attention span. I've found that the one line a day is easy enough to keep up with.

Books I've Read
There's no frigate like a book, amiright?

I created this spread after seeing someone do something similar on Tumblr (where else?). My idea is to write snippets about books I've finished. This way I'll having a running list if I ever want to put up another blog post with my recent favorite reads.


Quick Tip:
Make writing in your bullet journal-- be it in the journal part or the scheduling part-- a fixed part of your daily schedule. For me, right before I go to bed, I like to glance over my schedule, add in new tasks, mark off the day, etc. If I leave my bullet journal out and about and tell myself 'oh I'll write that down later' it never ends up happening.

The reason why this bullet journal has stuck is two-fold. First, it is extremely flexible. If the week gets too busy and I forget to write a couple of days into my weekly spread, no big deal! I can skip as many days as I want and fit in the days that I am going to plan. If I want to do a spread listing my blog post ideas, or recipe ideas, or exploring Colombia ideas, then I can. This is no guideline I have to follow, no set number of pages devoted to anything-- it's all free form.

The second reason why I personally have kept with it, is that the bullet journal is a great creative outlet for me. Especially during the semester, I don't necessarily have time to draw or illustrate or color or do anything creative. And if I did, sometimes I would feel guilty for taking time away from work. The bullet journal allows me to be creative while doing something that has become essential for me: planning. On weeks when I've fallen behind on my bullet journal, I've noticed a negative impact on my productivity. Writing everything down and planning it all out helps me feel less overwhelmed when juggling school, teaching, homework, research, and life in general.

As with anything I love (books, blogging, etc), my ever present goal is to convert everyone around me. I would love to see what my creative friends come up with it they ever tried their hand at bullet journals (you know who you are!).

If nothing else, I hope this blog shed some light on one interpretation of how bullet journals work!

Thanks for reading :)

Friday, August 7, 2015

An Upcycled Loveseat

Next up on my search for furniture was a loveseat. My apartment isn't the largest, so I opted for a smaller loveseat rather than a couch. At first, I figured this was something that I would just have to buy new. After all, loveseats from the thrift store conjure up all sorts of bad imagery.

However, after seeing the price of loveseats today, I decided to consider a secondhand loveseat. The cheapest loveseat I could find new was around 350-- and I didn't love it, just the price.

But where could I find a decent, clean, affordable loveseat? A co-worker recently raved to my mother about this thrift store she had found in a nearby town. She got some great pieces for even better prices, so we headed to check it out.

And we hit jackpot. My entire apartment was like 80% furnished by this one thrift store (or antique mall; I use the words interchangeably, though I know for some people they mean very different things. This place was clean and organized (not like a thrift store) and had quality pieces (like an antique mall) but for thrift store prices (see my confusion?)).

I found this adorable loveseat tucked away by the front window. It was small-- two cushions wide rather than three-- but lovely. It had a yellowish cream damask fabric that I wasn't loving, but it was for the most part clean and without stains. The cute wood feet hinted at the age of the loveseat.


I plopped down on the loveseat and promptly found my first problem-- it needed a new cushion; it had so much give I figured the cushion was just shot. Also, the fabric wasn't the color or pattern (or century) that I wanted and reupholstering isn't cheap. I figured it was a lost cause until I saw the price. 86 dollars!

86 was a steal for the loveseat. It was in great condition (no smell and only one small stain), even with the thin cushion. If I needed to, I could've used it as is. But with that price, I had room in my budget to update it and still come in less than a new loveseat.

Here's where I lucked out-- my father knows a guy. He owns an upholstery shop called Trumann's Upholstery in Bay, Arkansas. Trumann is small town and Bay is an even smaller town, barely a wide spot in the road, near mine. It's a rundown old white brick building with absolutely no signs anywhere. Every time we drive there we're leaving Bay before we realize we missed it.

Bubby (that's his name. For real. It's great) has been in the upholstery business nearly his whole life-- and if you stop by you're guaranteed to hear at least a part of his story. Most likely he'll start in the middle and leave you trying to puzzle the stories together. The shop itself must break every fire code ever written. The front portion has every square foot covered with the bones of old furniture and dusty fabric to the point that you can't even walk in. Instead you have to go to the unmarked white door to the workshop and walk in. The workshop isn't much better-- there is a thin path, one person wide, carved out between work stations and projects.

He also doesn't really quote prices, he just assures you it won't be much (and it never is!). When we brought the loveseat to him we still didn't have fabric. Upholstery fabric can run 20 a yard and we didn't know how many yards we would need. Bubby was able to tell us the age of our loveseat-- it was made either in the 1940s or 1950s, judging from the way it was constructed. Also, that cushion I thought need to be replaced? It was down feathers! This loveseat was quite fancy back in its day-- instead of a foam cushion, they had a large pillow that was full of down feathers.

Bubby estimated it would take 8 yards of fabric-- which is also how he prices the work. The work he estimated would run around $240, still making the loveseat less than the new ones (which are found in big box stores that mostly certain do not have the history mine has;)). I explained how I was looking for some neutral color, not too dark, but not light enough to show stains. He dug around in his shop and pulled out a huge bolt of light green/grey fabric, which he graciously threw in for free. ((Perks of knowing the right guy!))

This brought my loveseat up to 326, all in. Bubby added a zipper to the main cushion, stuffed it with some batting to make it super comfy, made arm covers, and made two little pillows, as I had mentioned wanting some.


It turned out great! The new fabric is gorgeous and it looked great. Not only that, but the extra batting in the cushion makes it perfectly comfortable. It'll look great in my apartment. :)

I originally titled this post "DIY loveseat" but then I realized I didn't do really anything-- I had a professional do it instead. Seat cushions are one thing-- an entire loveseat is way out of my crafting league.

Anyway, just wanted to share my story! Apparently it is possible to shop for couches at the thrift store and not end up with a smelly/stained/awful mess.

Thanks for reading!

Wednesday, August 5, 2015

DIY: Upcycled Thrift Store Chairs

This summer I've been browsing through flea markets, searching antique malls, and hitting up local thrift stores all in search of apartment furnishings. There are plenty of old tables out there, but most of them don't come with chairs decked out in the most modern fabrics.  

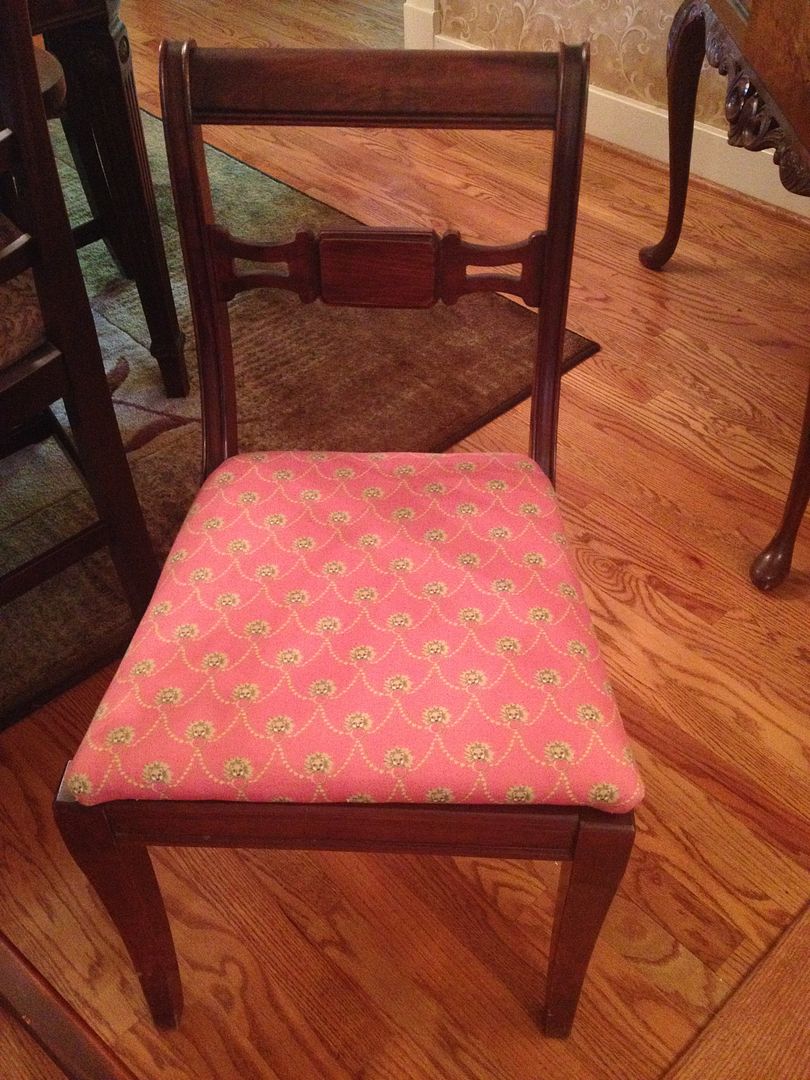
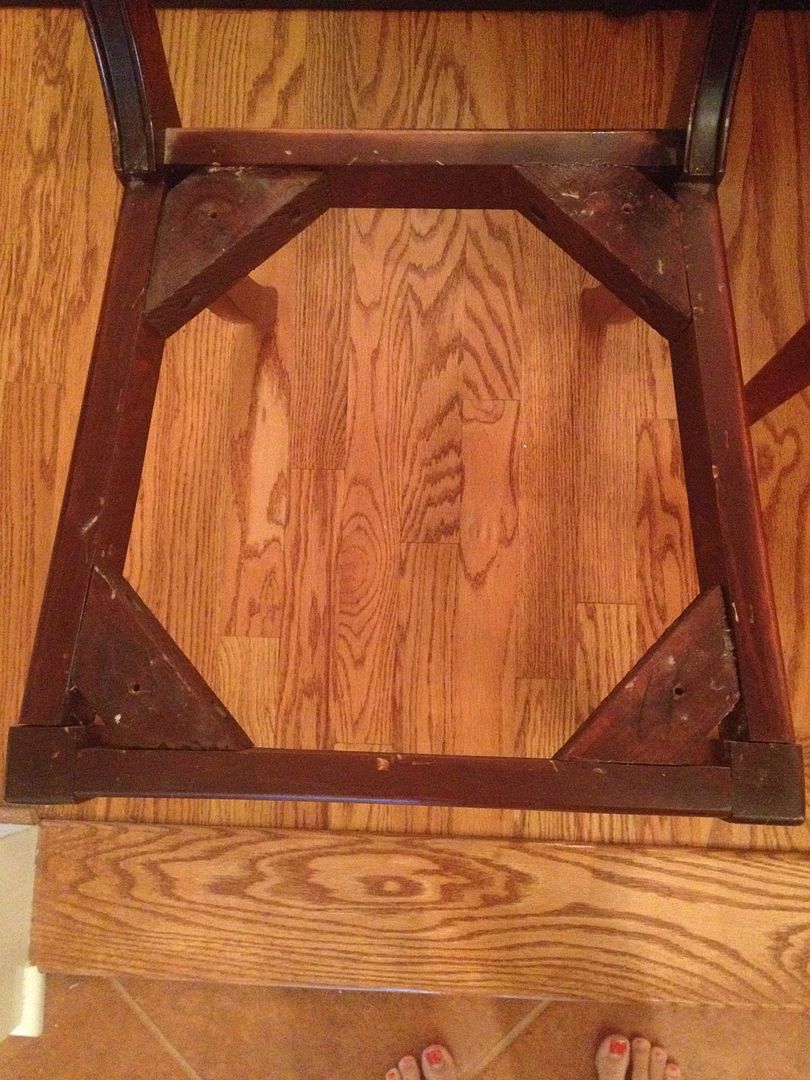
My parents found this old wood dinning table with four chairs for a great price. The only problem was the seat fabric wasn't really what I wanted for my apartment.

 As you can see the fabric isn't really bad, it's just a little outdated and not the color I was looking for. As I'm living in what's technically a 'basement' apartment I'm trying to bring in bright colors whenever I can.

This type of chair is the easiest type of chair to recover. The seat, after a little unscrewing, just pops off, allowing you to strip the fabric and staple on the new.

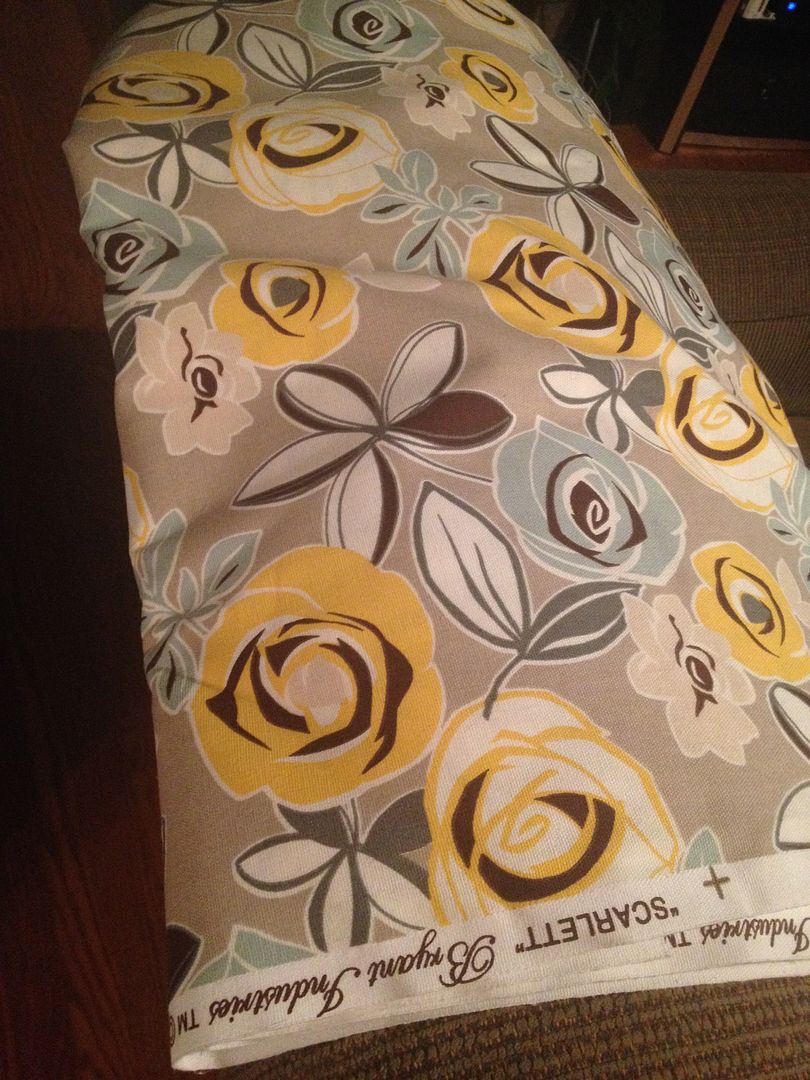
Which is exactly what we planned on doing! To pick out my fabric, I headed to Hancock's Fabric, armed with a 50% one fabric item coupon. Turned out I didn't need it. I perused the clearance rack and stumbled upon a couple yards of fabric that I thought would be just right.

And for 5 dollars a yard, it was a steal! Most upholstery fabric retails for closer to 20 a yard. There was four yards in the clearance section-- which was more than enough for the four chairs.


I thought if I covered the chairs with this, I could go back and do bright yellow/blue pillows on my couch for even more color.

Now comes the fun part!

Step One:

Unscrew the seat. There should be four screws, one in each corner. Once they are out, the seat will just pop right off. 


Step Two:

Strip the old fabric off. Most likely it was stapled onto the seat, so just pull the staples off and the fabric should fall off as well. This isn't a necessary step-- you could leave the old fabric on and use that as a little extra cushion.

Step Three:


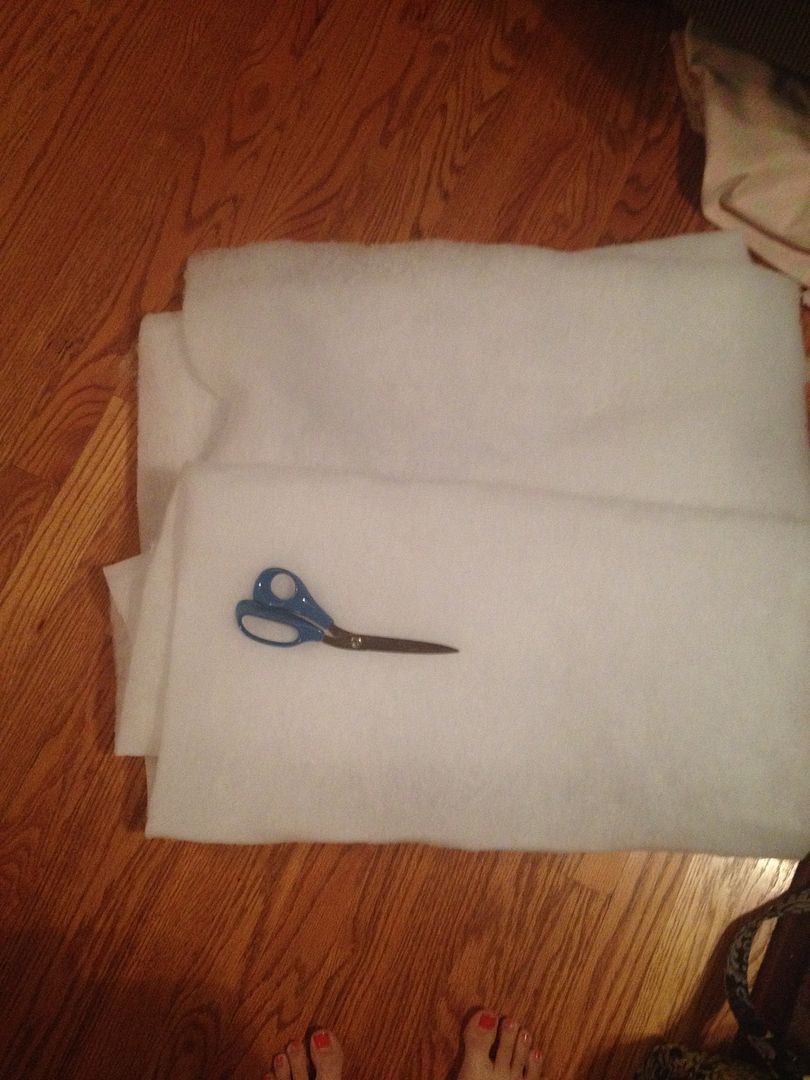
If desired, add more more cushion to the chair. You can do this by buying some batting at a fabric store, then using the seat to cut it to size. Make sure to cut it large enough that you can wrap it around the back of the seat in order to staple it.

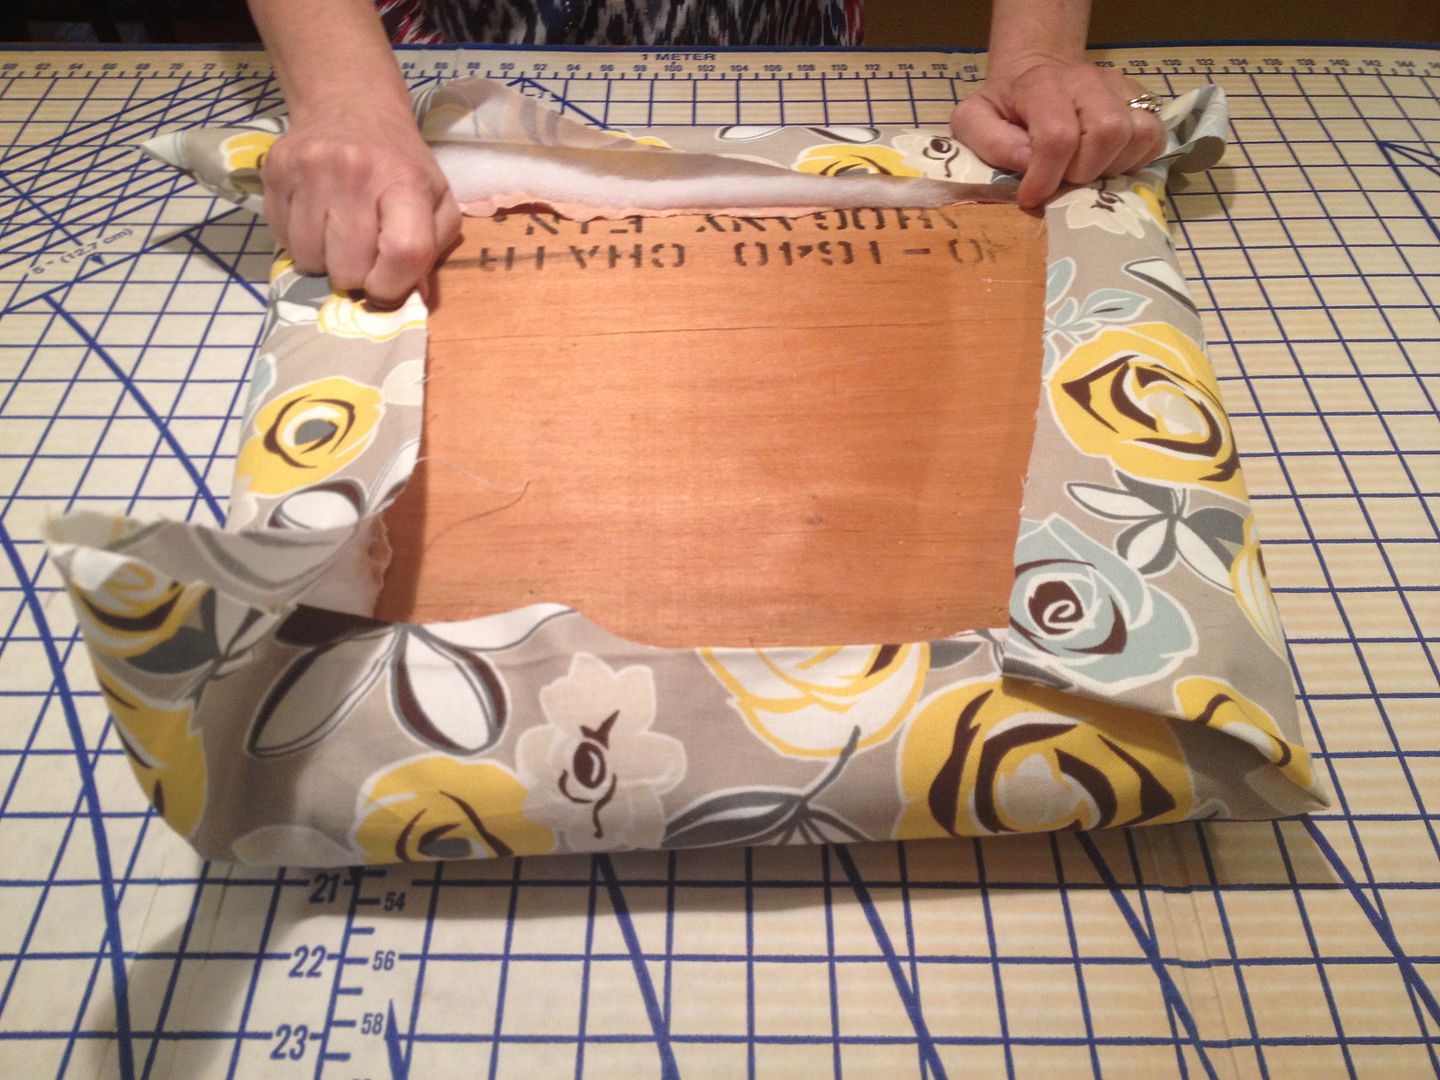
Using a staple gun, staple along the edge to adhere the batting. Then, fold the corners and staple them down as well. The corners require a little trial and error to figure out which fold works best.

One way to fold the corner is to pull the sides in, leaving a top flap, and then pulling the top flap down, stapling it, and then cutting any excess off.

[[As a side note, my first assignment in computer science 101 last fall was to write down how to fold an origami owl using only words. I thought it was an interesting assignment-- I got style points for my LOTR reference, but when my roommate tried to follow my directions, the resulting blob of paper looked more like a mishapened creature of the dark rather than a cute owl. This flashback brought to you by the batting description ;)]]

Step Four:

Next up, the fabric! You're going to do the same procedure as with the batting-- use the seat to trace out how much fabric to cut, allowing a good 3 or more inches on either side to pull over. Once you've done one seat, you'll see how much excess you really need. For the first seat be sure to err on the side of caution and cut out a large square of fabric.


Note: Be sure not to cover up the screw holes in the bottom of the seat with your new fabric. If you accidentally do, then just take scissors and dig the holes out so that you can properly reattach the seat.

Step Five:

Now, just pop your seat back onto the chair and screw it back in. You're done! You've transformed a dusty old chair into a hip new one. 


((I'll post a close up later when I got home! I'm blogging from the road today and this is the only 'after' photo I could find)) 

EDIT: here you go!


As always, thanks for reading! And be sure to stay tuned-- I have some fun posts coming up including more up cycled furniture and possibly a collaboration! 

Sunday, January 11, 2015

DIY Watercolor Mugs

Do you remember the water marbling nail craze? I was in high school when it was most popular, and never was able to pull the technique off on my nails. It was fickle and wasn't worth the effort, as I knew my nails would chip in a day or two regardless.

However, a couple weeks ago, I stumbled onto a DIY which put the water marbling technique to great use on a surprising subject-- mugs!

While I loved the idea, I was worried that water marbling mugs would be just as difficult as my failed-nail attempts. After all, the finished product looked gorgeous-- and anything that looks that cool had to be impossibly hard, right?

Wrong! I was happy to find that water marbling mugs was delightfully straight forward. In less than 10 minutes you can have a beautiful watercolor-inspired mug!

What you'll be making:


What you need:
  • A mug. I like using white mugs, so the color shows better, but they can be a little tricky to find. I've had luck at Walmart and various thrift stores.
  • Nail polish. For the color to show up, you need a really vibrant polish. Not all nail polish works-- it takes a little trial and error. For me, as long as the polish is really colorful it works.
  • Dishwasher safe Mod Podge. This is the most difficult product to find, but essential if you want your mug to be dishwasher safe. If you skip this step, the design might come off, even if you just hand wash the mug.
  • Plastic basin to do your marbling in. I used an old tubberware container. Just make sure that the container is big enough to dip the mug into. 
That's it! Like I said, the dishwasher safe Mod Podge is a bit tricky to find-- Hobby Lobby doesn't carry it, but Michael's does (unfortunately I don't live near a Michael's and had to buy mine online at Overstock.com).

Step One:

Fill your plastic container with warm water from the sink. It doesn't have to be hot, but the warm temperature will help keep the polish from setting too quickly.

Step Two:


 Pour a little nail polish into the container. It should spread out over the surface of the water. It won't look too dark-- and that's okay. It will take a little trial and error to see how much polish you need; obviously the more your pour into the water, the darker the final result will be. For a reference point, I didn't use a lot of nail polish for the mugs pictured here.

Step Three:

Working quickly, so the polish doesn't dry and set into a unusable film, dip your mug into the water. Some nail polishes set quicker than others. If you wait too long, the polish will become a hard film on top of your water and won't adhere to the mug properly. I don't have a picture for this step because I was too worried the polish would set while I was messing with my phone.
It's hard to anticipate exactly how the polish will go onto the mug, which for me is part of the fun. Experiment with different angles and different depths until you find a result you like. If you don't like your mug-- or if the polish gets too close to where you'll be putting your mouth-- simply use nail polish remover to take the design off and try again.

Step Four:


Now it's time for Mod Podge! While this dishwasher safe Mod Podge is non-toxic, it is not food safe. This means that you need to keep the Mod Podge away from where the drink/your lips will be going. I used painter's tape to tape off about an inch around the top of the mug to keep the mod podge from going there.

The Mod Podge container recommends 2-3 coats, allowing a couple hours in between coats for it to dry. Before you seal the mug you can use sharpies to decorate it further//write a quote///whatever your crafty heart desires.

The container also recommends waiting 28 days before washing the mug. This obviously is just a suggestion-- if you just must use the mug before then, you should probably gently hand wash it, avoiding the design if at all possible.


I've heard positive reviews of the dishwasher safe Mod Podge, but I'll be sure to write an update in a month or so to let you know how the mugs are holding up! 

Exciting News!

I just opened an Etsy shop! If you love these mugs, but don't want to buy the materials and make them yourself, please click here to check out my mugs. :) 

Thanks so much for reading! I really enjoyed this craft; I'm off to make some more mugs.

Be sure to check back; I have a least one more sewing craft up my sleeves before the semester starts!

Friday, January 2, 2015

DIY Crayon Lipstick

What? I'm still alive?

I know it has been months since I have last posted here. I couldn't think of a creative way to convey how much physics homework I was buried beneath, and since that's basically what my life  has been like this past semester, I haven't written a post.

Now that it is officially the Christmas holidays, I have more time to get back to crafting! Most of my crafts have been Christmas gifts, thus the continued lack of posts. But today I did a quick DIY which thus far I don't plan on gifting out.

All you need is some crayons, some Vaseline, olive oil, and in less than 10 minutes (or at least, that was the plan) you can have a customized colored chapstick/lipstick!

Most people use coconut oil and if you happen to have that then go ahead and substitute that in. I do not own coconut oil, and it's too expensive to pick up for this craft, so I just grabbed my handy-dandy Vaseline. ((Okay, technically it was my lovely mother's handy-dandy Vaseline that she lent me))


Can we just take a second to appreciate the little photo set-up I have going here? I took advantage of the light that was temperamentally streaming through my window, and grabbed some white paper to reflect the light onto my subjects.

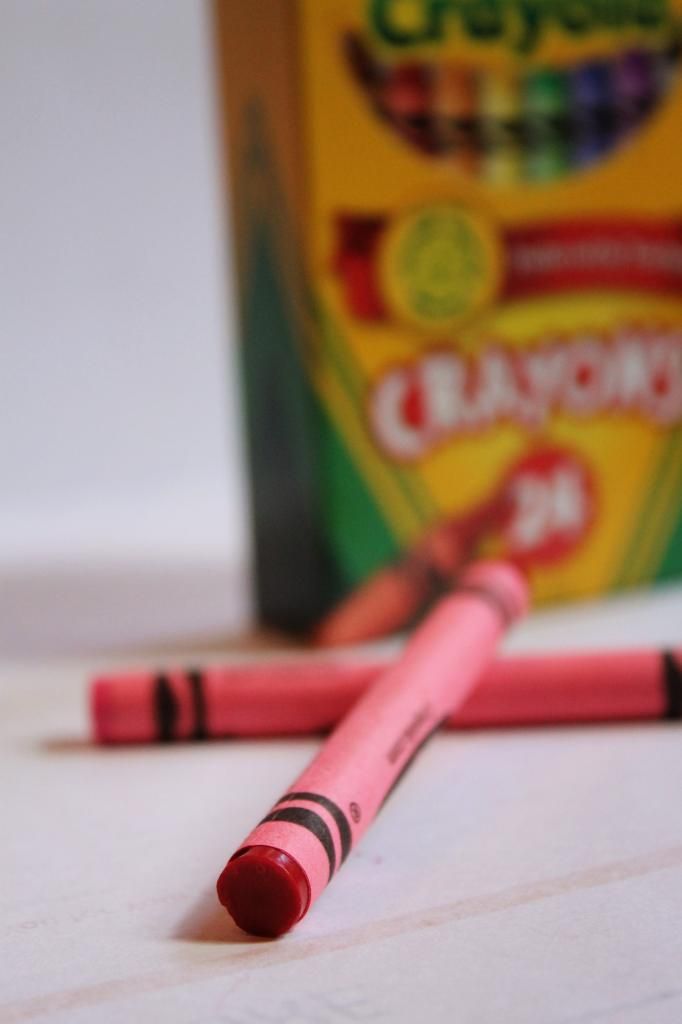
I decided to go the normal route, and grabbed a red make my lipstick. I didn't want my lipstick to be too blood-red dramatic, so I grabbed a pink crayon to soften the color.

I used two inches of red crayon and one inch or pink crayon.

Tip: Use disposable everything. Cut the crayons with a plastic knife, put them in a disposable (but microwaveable safe) bowl. You don't have to, but this will make your life better. Crayons have a nasty habit to sticking to something-- say a knife edge-- and never letting go, which makes clean up a mess.

I ended up using (after much trial and error) 1 1/4 teaspoons of Vaseline and probably 1/2 teaspoon of olive oil with my crayons.


Put your crayon pieces,Vaseline, and olive oil, in a microwavable safe bowl and start to microwave. I did 30 second intervals. I read one tutorial which said only do 5 second intervals or your mixture will explode. They must have been working with a restaurant grade microwave because my little microwave took much longer to melt the crayons. It took me maybe 5-6 minutes for my crayons to finally melt.

Another way to melt your mixture is set up a double broiler (just put a bowl over some boiling water on the stove). I never have much patience to set up a double broiler, so I stuck to my microwave.

Every 30 seconds I used toothpicks to mix up my slowly melting crayons.

The hardest part of this craft is finding the right crayon:Vaseline:olive oil ratio. I first made a batch using 1/4 teaspoon per inch of crayon and no olive oil. This seemed to work fine, but after sitting on the counter for five minutes the mixture was hard and unusable. Since I had used the last of my Vaseline in this attempt, my craft was put on hold until I bought some more Vaseline.

I reheated my last attempt and threw in more Vaseline and slowly poured in some olive oil. The olive oil seemed to help liquify the crayon mixture. Also, it feels great on your lips, even if I began to feel like a rotisserie chicken ready to be broiled after slathering the mixture onto my lips.

Once you've heated your mixture until it is liquid, pour it into a small container.


And the award for the sketchiest chapstick container goes to me for this pill container I picked up at Dollar Tree.

Hey. Whatever works, right? I twisted off the top container and it looks like a perfectly normal little chapstick holder.


Et, volia!


I put some on my hand to make sure that I had not diluted the color too much with all my Vaseline and olive oil. I like the color! It turned out more vibrant than I had expected. It goes on the lips quite smoothly, thank you olive oil.

This craft is great for make Halloween/stage makeup where you need odd colored lipstick. As far as safety goes, as long as you don't wear this everyday you'll be fine. This definitely won't replace any cheap lipstick I buy at the drugstore, as it is annoying and messy. However, if you want weird/cheap colors for costumes, this is a fun craft which actually works.

I have a couple more crafts in the works, so be sure to check back!

Thanks for reading :)

Friday, August 22, 2014

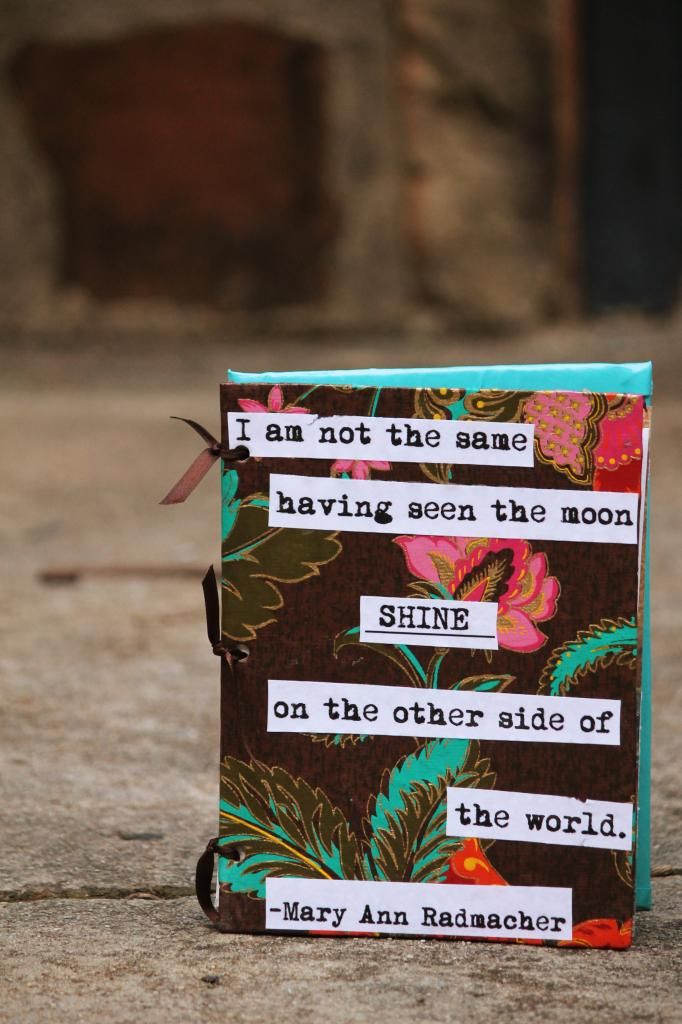
DIY Journal


What I made:


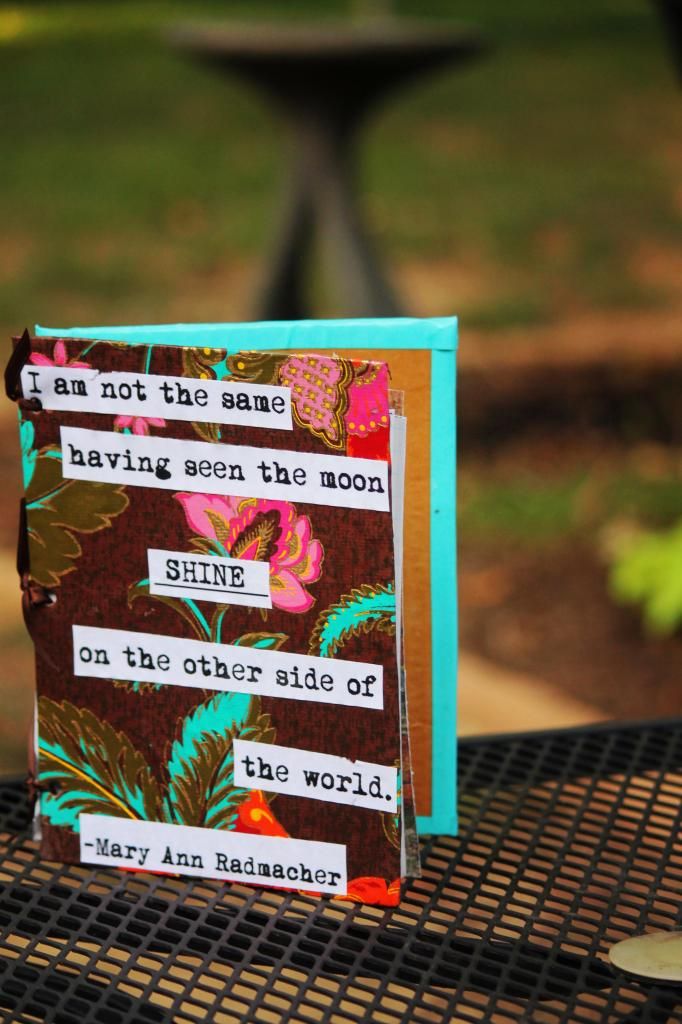
As the pages in my current journal come to an end, I started looking around for a replacement. I knew what I wanted-- a rather basic one, perhaps with a cardboard-type cover that I could cover with whatever photos/quotes I wanted.

I perused all the usual places-- clearance racks at Target, Hobby-Lobby-- and found nothing that resembled the blank slate that I wanted. Then it hit me. If I wanted a cardboard cover that I could decorate, then I should just take some cardboard and make a journal. How hard could it be? And that way, I could dictate what type of paper was in it, lined or not, and what how the journal was decorated.

I gathered any material around that looked like it had journal potential. I considered poster board, flimsy poster board, scraps of cardboard, and even the backs of used spiral notebooks. In the end I decided that while I wanted a hardcover journal, the poster board was a bit too thick, and choose the scraps of cardboard. The two pieces of cardboard I found were slightly differing thickness-- the thinner one was tremendously easier to work with than the thicker piece, which was quite annoying, though still feasible.

I used my previous journal as a guide, and used a box cutter to cut my cardboard pieces down to size. They were rough-- but since I was going to cover them with paper it didn't matter.

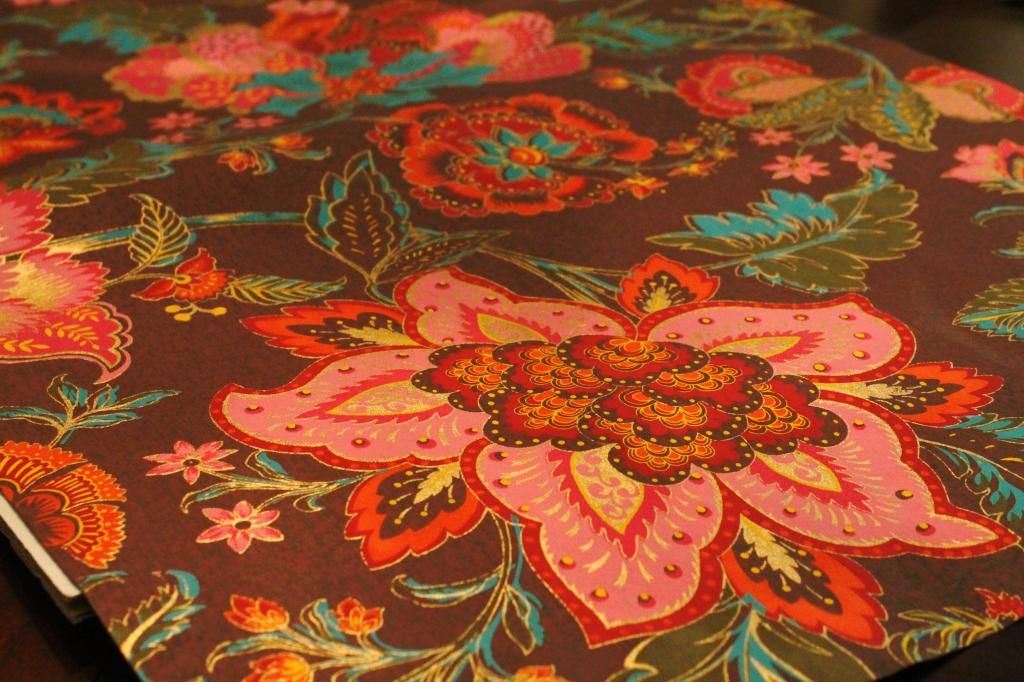
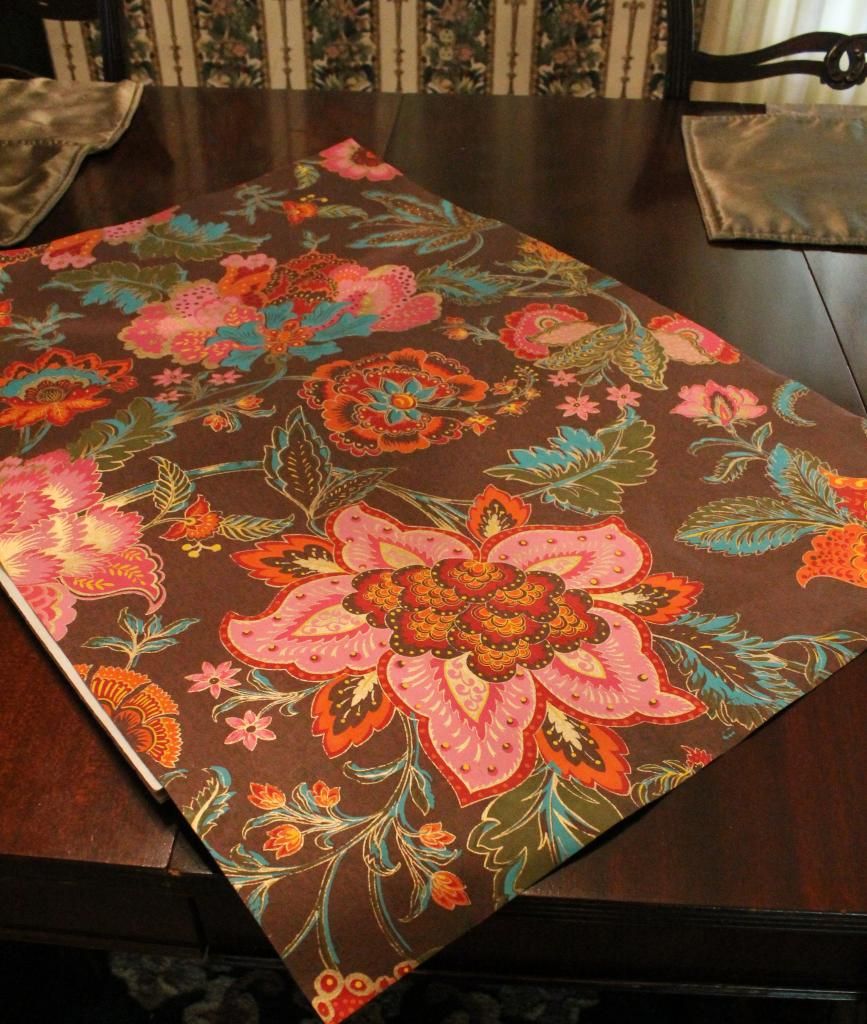
Remember that canvas DIY I just did? Well, the sheet of patterned paper I used (which was 3 dollars) was larger than the canvas, so I had a decent amount of excess.

 
I chose to use that to cover the front of my journal. I slathered the cardboard with Mod Podge and arranged my paper so that I had enough overlap to wrap the edges. Sorry for the absence of photos! I wasn't sure if the craft would turn out and my ever-handy iPhone no longer takes acceptable photos. Eventually though, I figured I would blog about this, and pulled out my SLR.


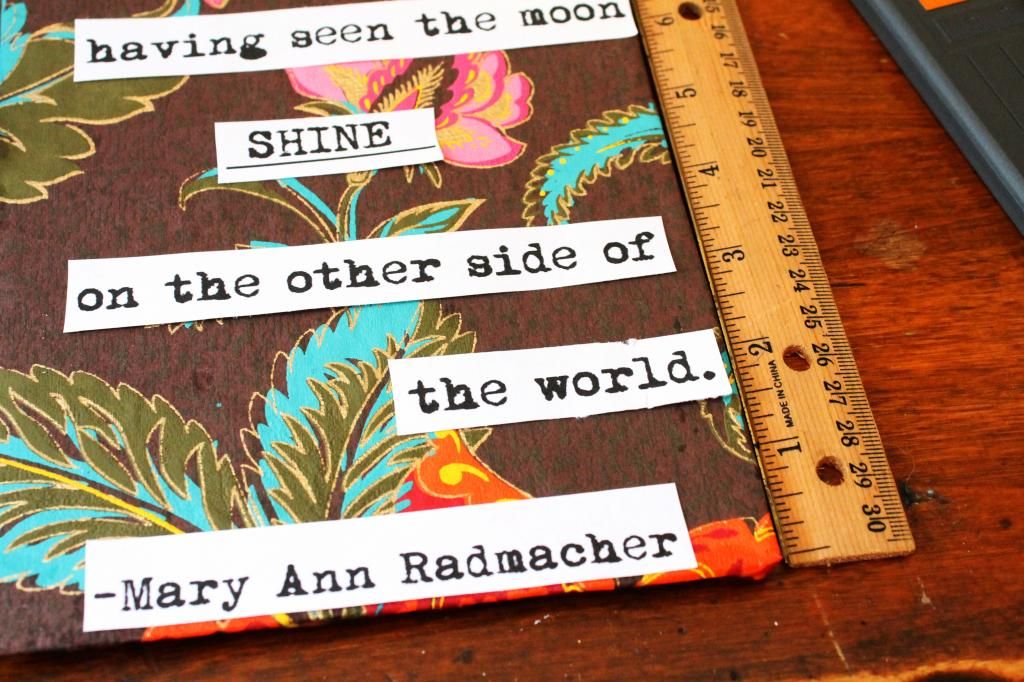
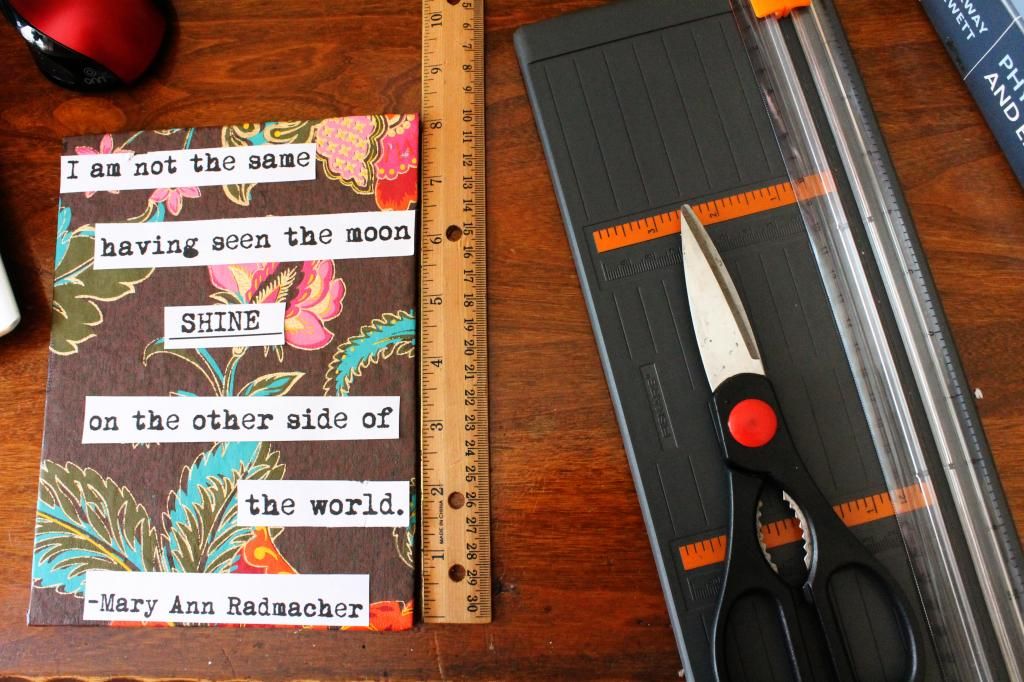
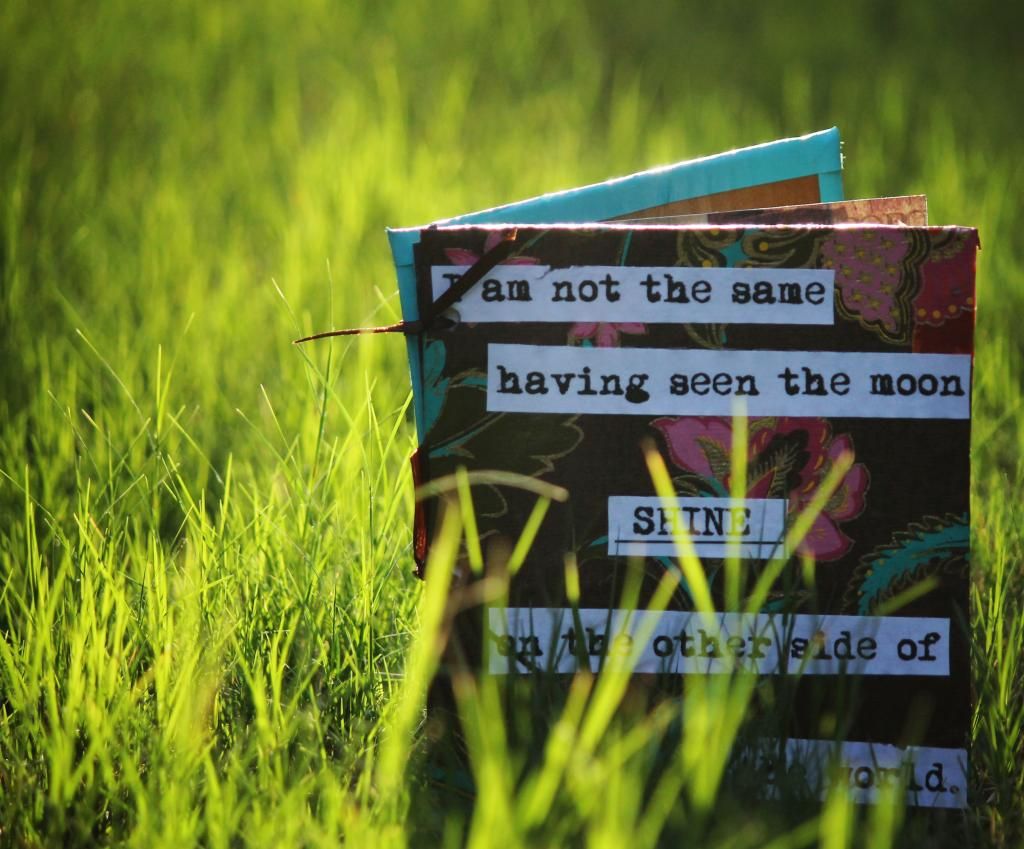
To decorate the front, I found a quote online that I liked and downloaded a free typewriter font and printed it out. I liked the idea of having block white quotes on top of patterned paper. Since I suck at cutting/drawing/anything to do with straight lines, I used a little cutting device to help. I spaced out the words and then used Mod Podge to fix them to the cover. Then, for good measure I spread Mod Podge evenly over the entire front cover. What this does is give it some mild weather proofing-- the Mod Podge acts like a sealant and helps protect the paper.


And that was the front cover! Next I worked on covering the back cover. I had enough of the floral paper to cover the back but I opted to go for a solid blue piece of cardstock instead. I also gave this a light overall coat of Mod Podge to seal it.

Next up, hole punching! The front cover wasn't ornery-- the hole puncher easily went through the thin cardboard. The back cover, however, was awful; the hole puncher couldn't make it through the thick cardboard. I managed to get some holes in there, but if I had been more discerning with my cardboard selections in the first place, it would have went a little smoother.

I am still not sure exactly what type of paper I want to stock my journal with. For starters I cut some regular line paper into a size that would fit, and hole punched it.


Currently, to bind my journal, I have three pieces of ribbon tied in knots. I'm looking around for some little metal clasps that might work better. For the meantime, the ribbon is doing just fine.

Random interlude-- I took a picture of this beauty while doing my mini-photoshoot for the journal.

One of the things I love about this journal is how completely customizable it is! If I ever want to add photos, all I have to do is punch some holes in them, untie the ribbons and add them. I can add new pages, pictures I like.


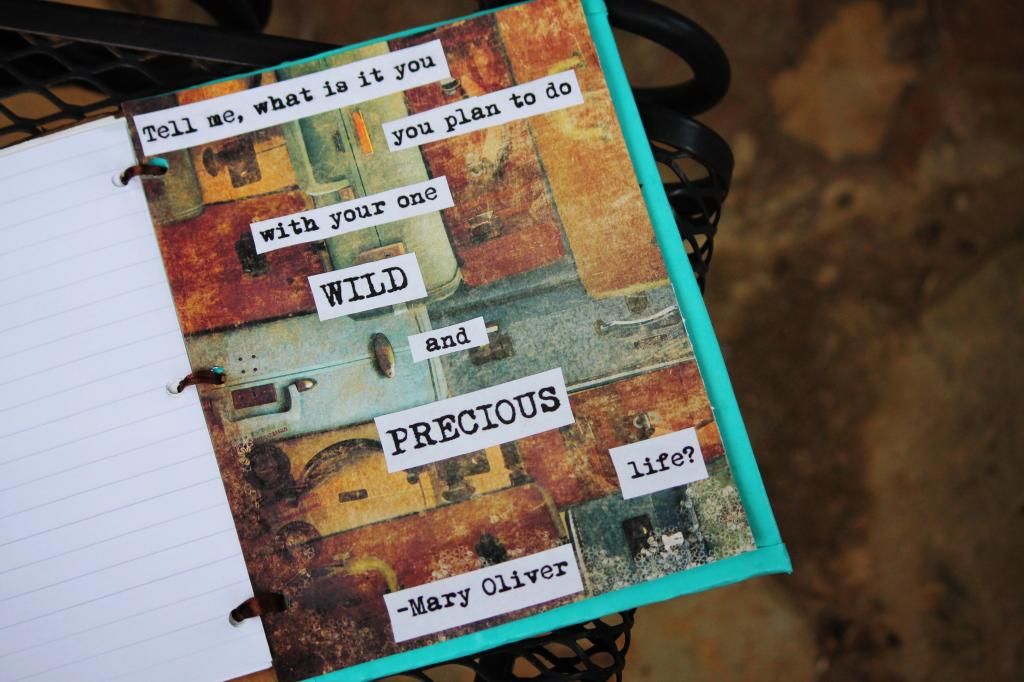
This is one page I put in with the regular lined paper. I love this poem and used some baby typography on a pretty piece of scrap booking paper ((having a mom who does card making comes in handy;)).


And there you have it! A lovely, customizable, easy to make journal, all made with material I found laying around the house. :)
Thanks for reading! I move back to college this Sunday so my time for crafting will see an exponential decrease sadly. But stay tuned for more posts!

Sunday, August 17, 2014

DIY Dresser Makeover

This semester I'm moving up in the world.

I've gone from sharing one (tiny/moldy/size of a large closet) dorm room with two lovely people sophomore year to sharing an entire apartment with two friends senior year! The overabundance of mold/zombie-suicidal ants (true story) sophomore year may have helped boost my immune system, but I am quite excited to get a (hopefully) cleaner living situation this year. 

While there are obviously many perks to living in an apartment, the apartment is unfurnished. So I picked up a cheap plastic dresser/drawers set up. Next year when I'm off to graduate school I'll spend more thought and perhaps money on setting up an apartment, since it'll be more long term.


But this will do fine for at least one year. I've seen tutorials about cutting up a large poster and decorating the front of an old wooden dresser. I thought that could be a cool way to spice up my plastic drawers. However, my plastic dresser is a bit bigger than most of the posters I found online-- and I'm too cheap to spring for a large poster on a project that may or may not turn out.

Then, a week or so ago, I was wandering through a cool hippie store and stumbled upon a large sheet of patterned paper. I bought one sheet for my quick canvas DIY and bought another one for my dresser DIY. The papers were about three dollars a piece, and was big enough to outfit my dresser.


The hardest part about this DIY was just taking the time to cut and tape each little piece of paper into the drawers. I used the patterned paper for the front of the dresser and used black card stock for the rest of the sides. I'm a decently messy person, and I wanted to use the card stock to hid my messy piles of clothing/whatever ends up in the drawers.

I tried using Mod Podge to fix the paper to the plastic drawers, but Mod Podge doesn't work well with plastic, so I stuck to using tape. I measured how long the drawers were, cut up my paper, and taped it to the inside of each drawer. I made sure to apply extra packing tape so that the paper wouldn't tear as I threw clothes in and out of the drawers.


 It was a bit tricky to fold the purple paper over the contours of the drawer handle, but nothing a some scissors and some tape can't fix.

If you want your pattern to be all over the drawers, you can always find some fun wrapping paper and use that. I really liked the purple paper-- no one is going to see the sides, so I don't mind that they are just covered in black card stock.

Et, volia! That's it-- an easy way to customize a cheap set  of plastic drawers.


It's not perfect-- the purple paper was about 1in too small width wise, and I don't have a perfect amount of patience. However, you won't notice the imperfections unless you sit and stare at it and I know that is one thing I won't have time for this coming semester.


Thanks for reading! Hope you were inspired to spice something up with a little DIY.
 :)
Monday, August 11, 2014

5 Min. DIY Wall Art

Summer is coming to an end and the back-to-school season is in full swing! For some reason I love the influx of school supplies, the overabundance of school-themed commercials, the prospect of a fresh new school year. I've always been a geek and looked forward to the start of school.

Now that I'm entering my last year of college (oy!) the back to school season is slightly different. Not only do I have new classes to be excited for, I also have an apartment to decorate!
Enter, DIY decorations. This project is so simple I almost feel foolish posting about it. However, I thought the same thing with my collage art and I believe that post has the most views ever (like 1300 views! which is a lot for me).

A couple of weeks ago my family and I were passing through the wonderful city of St. Louis (where, in a perfect world, I might be attending graduate school) and stopped at a cool shop called World Market. I was shopping around for some posters/paper for another diy project I had going on (post soon to come!) when I stumbled upon these large pieces of patterned paper.


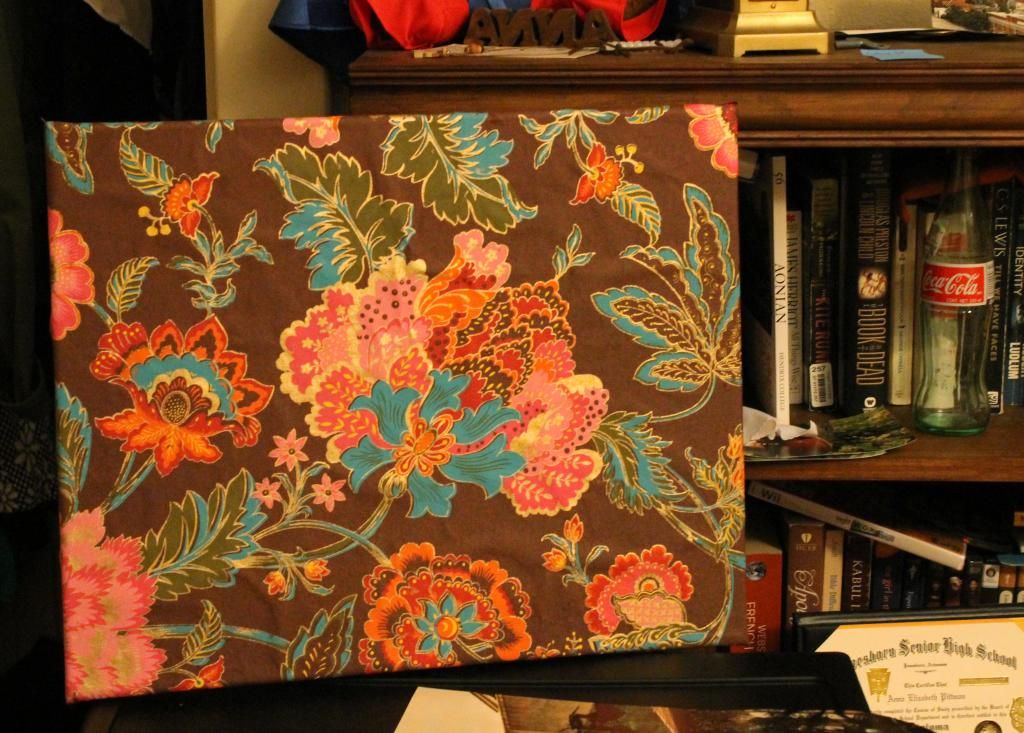
I fell in love with the flowery pattern. It was about the thickness of card stock (a little thicker than regular paper). I wasn't sure what I was going to do with it, but I knew I wanted it, somehow, in my room at college.

pretttyyyyy
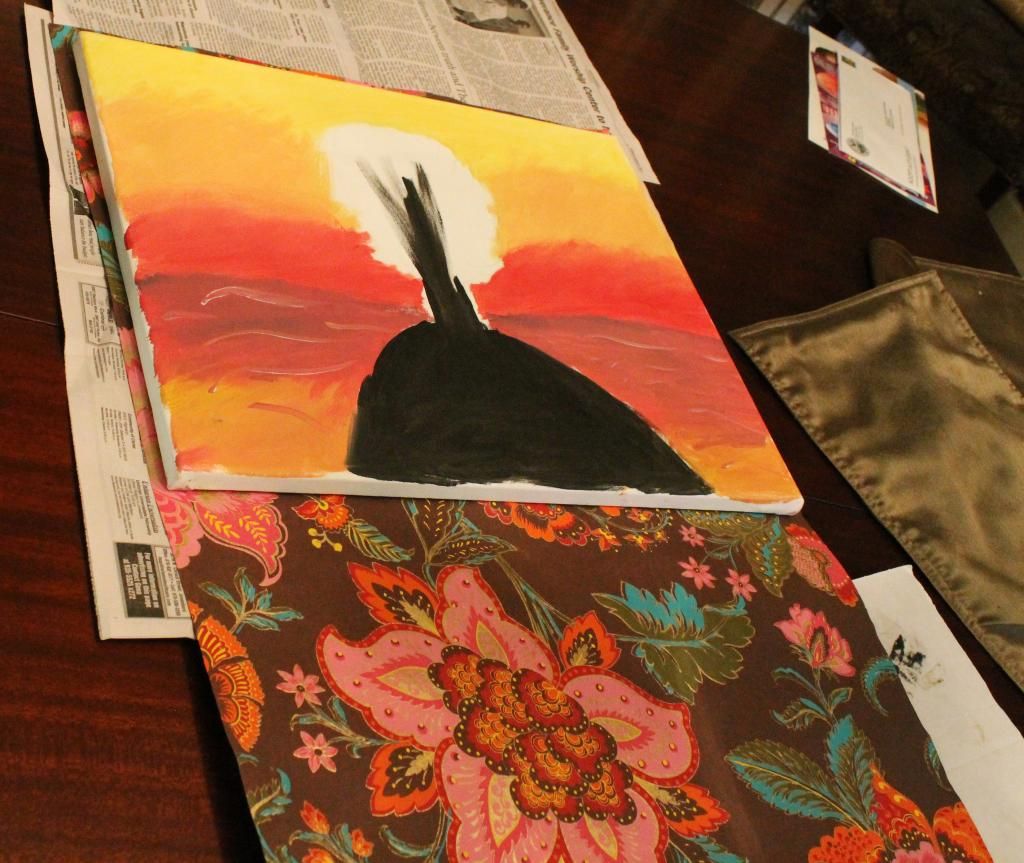
When we got back home, I rummaged through my crafting supplies and found large canvas with an abandoned paint project on it. I've always been very enamored with silhouettes and figured 'how hard can it be to paint them?' However, I lack almost all artistic abilities and my paintings never looked like they did in my head, so my painting phase was rather short-lived.


I laid my paper on the canvas, making sure that I had enough excess that I could wrap the paper around the edges of the canvas and then cut it to size.

My trusty sidekick!
There are a couple different ways to attach the paper to the canvas-- I just went with my trusty Mod Podge. You could always use tape or even staple the paper like the canvas was stapled onto the wooden frame.

If you go with the Mod Podge, all you have to do is put a thin layer of it on the canvas. Then, lay your paper on the canvas and smooth out any wrinkles. I let it sit for a minute or so before flipping the canvas over to work on the sides.


To help wrap the paper, I cut diagonally at the corners so the paper would lay flat.

Et, volia!


This technique can be modified in a variety of ways. You can print out a photo at Walmart and put it on a canvas. If you run across a cool wrapping paper you can always stretch that out over a canvas. The canvas adds definition and makes something as simple as a piece of paper a work of art.

I now have two weeks until school starts! Two weeks to study for the physics GRE, pack for school, finish all my sewing crafts, get all of my wisdom teeth taken out, and binge watch my new favorite show Supernatural.

Stay tuned for more back to school crafts!

Thanks for reading :)