As I looked over the artwork I stumbled upon a painting of flowers, painted on a irregularly shaped piece of old wood. The unusual canvas really added something to the otherwise ordinary painting.
I could do that, I thought. I must have seen that pinterest picture a thousand times. Some chick is holding up a piece of wood with a photo imprinted on it, a half sarcastic smile on her face as if to say 'really it's ridiculously easy'.
So I perused the Internet, reading tutorial after tutorial. First they said that inkjet printers (what most people have) just simply wouldn't work. I kept looking, finding different methods, all that promised beautiful results. Finally I had found enough information, spread out over a couple blogs, to attempt this technique myself.
What you need:
- an inkjet printed photo [[any ole photo will do, but make sure it is on plain white paper]]
- a piece of wood [[though I suppose you could try this technique with a variety of materials]]
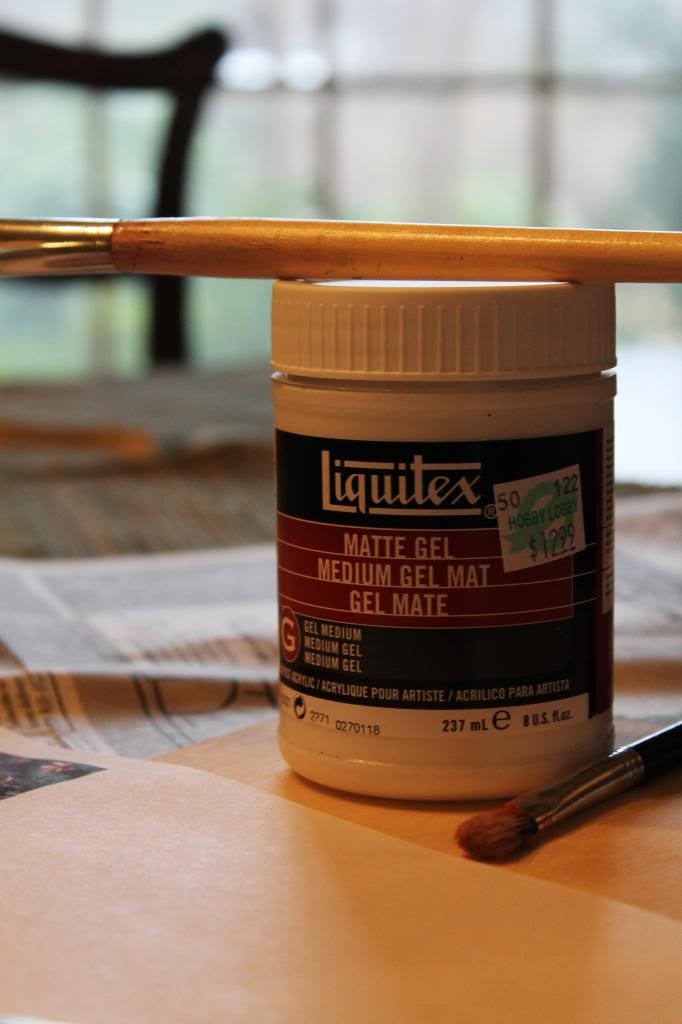
- gel medium
- paint brush [[or your fingers]]
To start off, find your perfect picture. If it includes words, or if you are partial to its orientation, make sure to reverse it so that when it's on the wood it'll look normal.
I printed off various copies of the same picture to try all the differing techniques I had found in my tour of the web.

Side note, I found this little piece of wood at Hobby Lobby! Apparently they sell some wood; and at pretty reasonable pricing.
Next, coat the front (picture side) of your picture with a healthy coat of gel medium. I used a paint brush to do this, but you could just use your fingers to spread it out.
Then, place the now covered picture face down onto the wood.
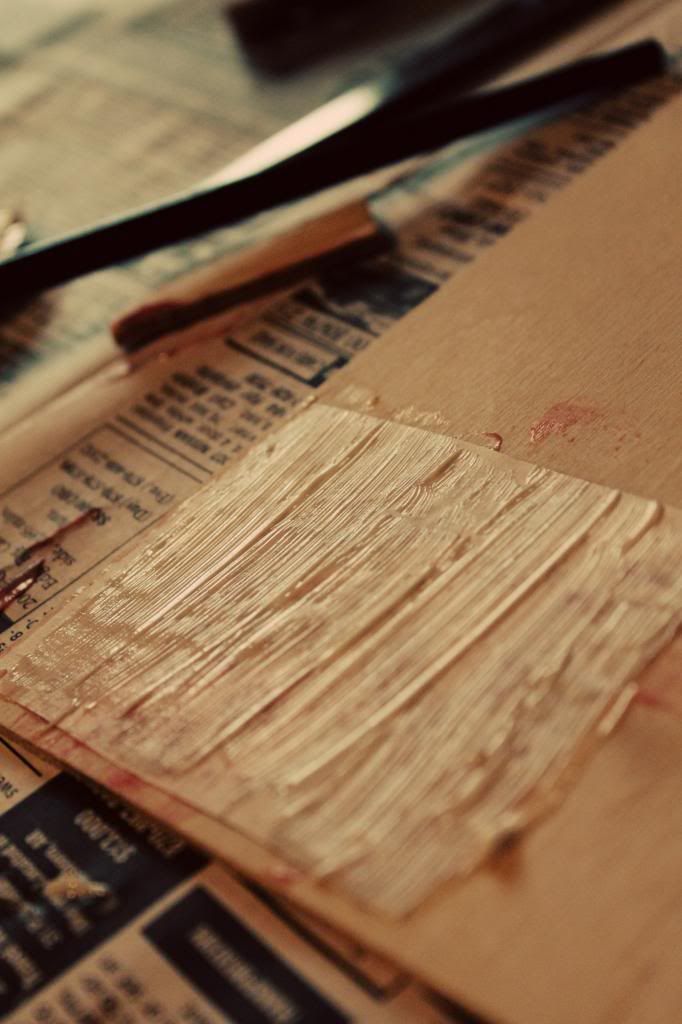
Now coat the back (plain side) of your picture with the gel medium. This is a tip I got from the art major working at Hobby Lobby; it did seem to help the final product.
Next?
You wait.
All the tutorials I've seen were all like 'oh yeah just set it aside for a couple of hours, even overnight.'
Now, if you happen to have the patience of a saint, go ahead, do that. Be calm.
However, if you're like me, and can't wait to see if this even turned out, then grab a hairdryer. Use a mixture of time and a hairdryer to make sure your picture has dried. Impatient as you might be, make sure that the photo is completely dry. Don't try and wing it and go 'hey that kind of seems dry enough' because I did that and it will not turn out.
So, here you are, with a nice and dry pasted on picture. What now?
Take a washcloth (or paper towel) and get it wet, and wring it out. Place it on top of your of your photo.
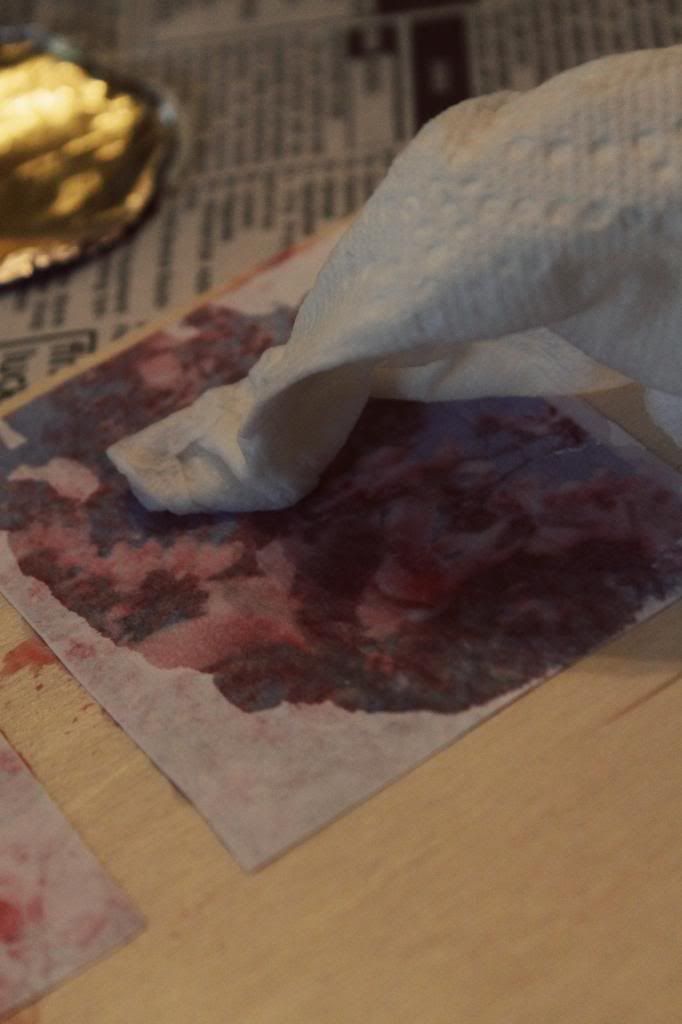
You should be able to see your picture bled through as you get it wet. Next comes the tedious part: rubbing the paper off.
One tutorial said just to stick the entire thing under the faucet and douse it with water to help get the paper off. I tried this and while it works, this method of the paper towel works better. If you use the sink, the picture can get too wet, making everything come off, leaving a hole in your picture.
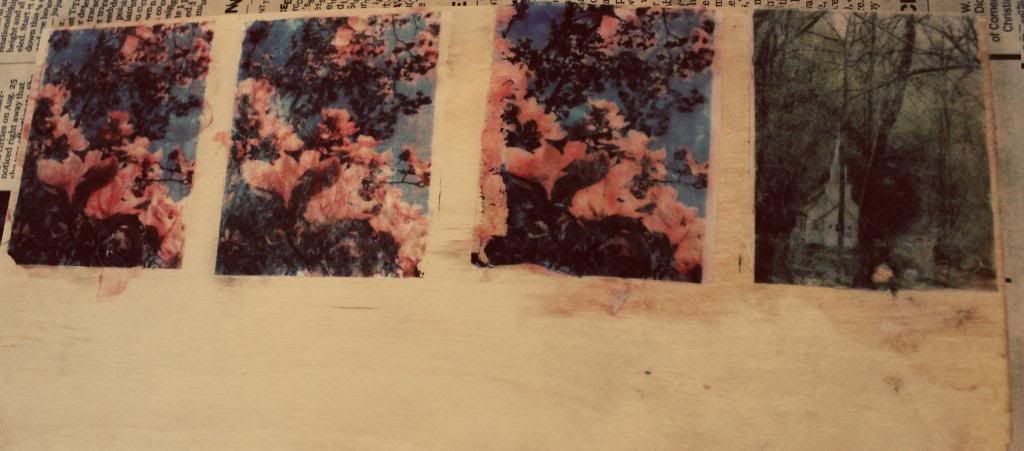
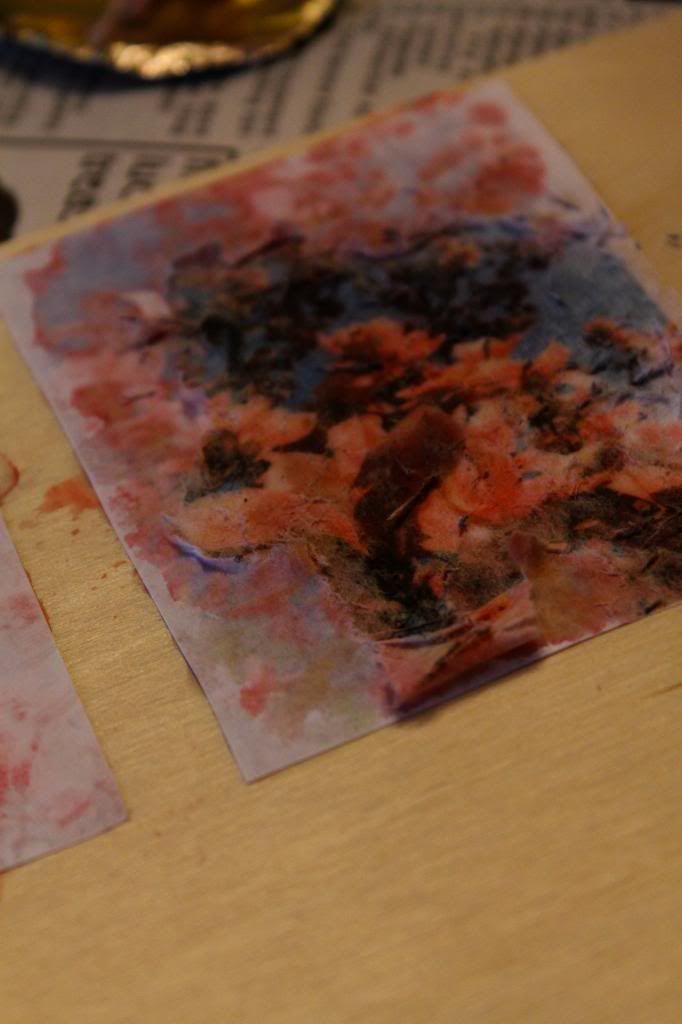
Here are the finished products. Starting from left to right, the first one I coated the picture and the back of the picture. The second one I did not coat the back of the picture (I don't think it turned out as well). The third and fourth one I dunked the entire thing under the faucet. As you can see, they technically turned out, but it was harder to get all the small little pieces of paper off, leaving a foggy look.
However, what I found out was that the fog was almost inevitable. You see, transferring a picture to a piece of wood will not give you an extremely crisp outcome. There will be smudges, a white sheen of paper, and other little imperfections.
Et, volia! From the computer to a piece of wood. I'm still experimenting with different photos. My goal is to eventually perfect the method and print a photo of mine to an old piece of wood.
Thanks, as always, for reading! If you have a question about the tutorial, just post.
No comments:
Post a Comment