My newest obsession is cheese making. If you know me, you know how deeply my love for cheese runs. So when I stumbled upon an 'easy' mozzarella recipe in a cool hippie cookbook I thought, 'hey, why not? How hard could it be?'
Famous last words. Thus far, I have successfully ruined an entire gallon of milk in two separate attempts to make cheese.
But cheese is not the topic of this blog post! If I ever have success with cheese making, then I will dedicate an entire blog post (or two) to my surprising amazing ability to craft cheese from milk.
Until then, I'll just write about a dye project I did.
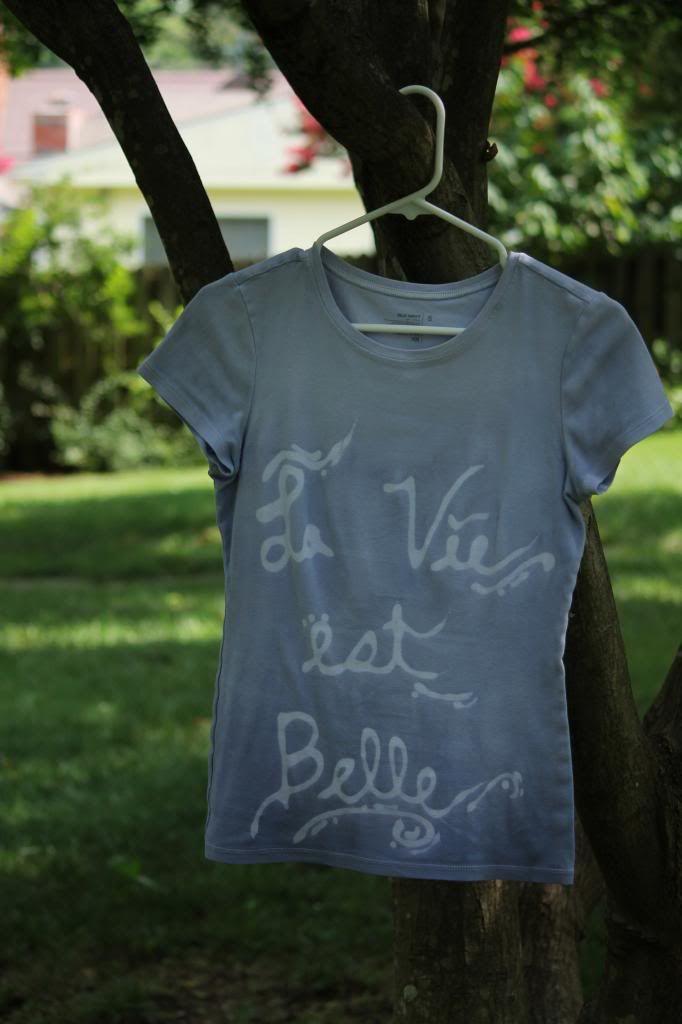
FINAL PRODUCT:
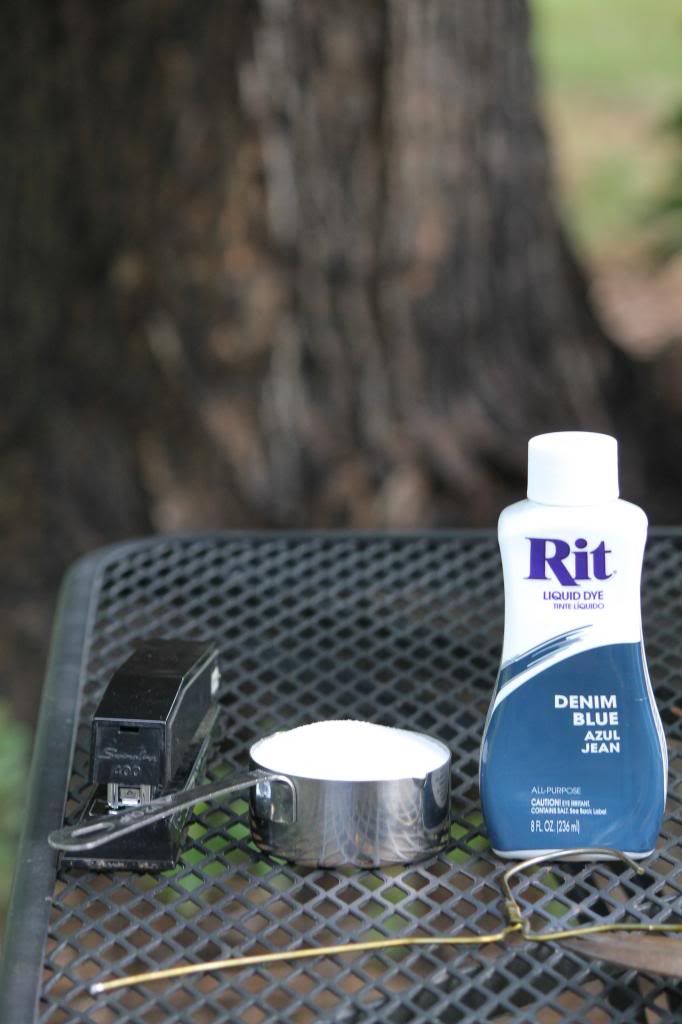
What you need:
- a white t-shirt (mine was 1.50 from Goodwill. Score!)
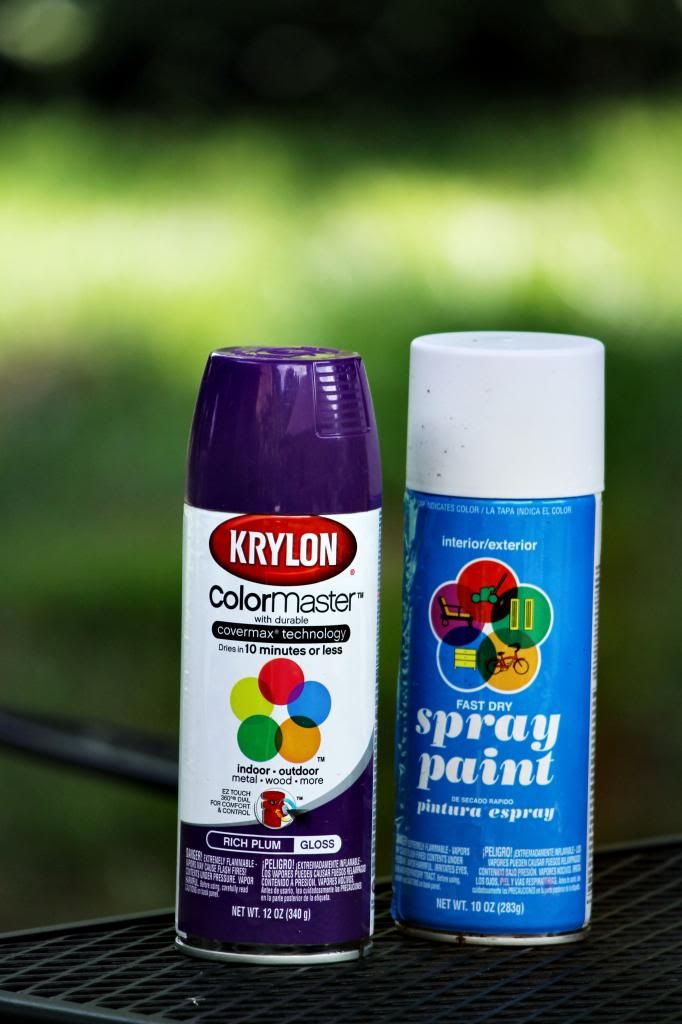
- RIT liquid dye (mine was something my mother bought ten years ago, never used, and shoved into the far corners of the closet)
- Elmer's blue gel glue (1.40 from Hobby Lobby with coupon!)
- Some salt
- A bucket
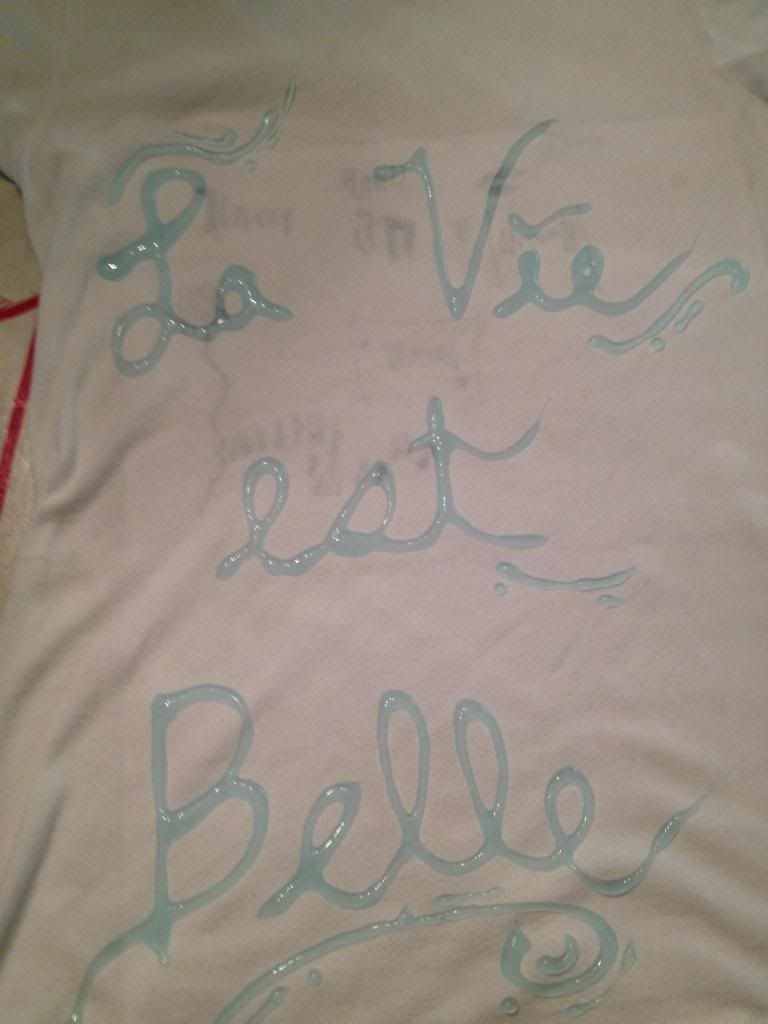
Step One:
Lay out your white shirt and draw a design with the glue.
Step Two:
Once your shirt is completely dry, get your dye bath ready. I filled up a large bucket with a hose and dumped in 1/2 cup of salt.
Next time I try this technique I'm going to use warm water and see if it improves the result.
Step Three:
I used a small baby hanger to hold onto my shirt as I dunked it into the dye bath. For the dye bath it's easy-- just pour as much dye as you want into the water and stir. Mine was a bit dark, so I just put more water into the bucket. Ignore the stapler in the above photo-- it was an idea that did not turn out well ;)
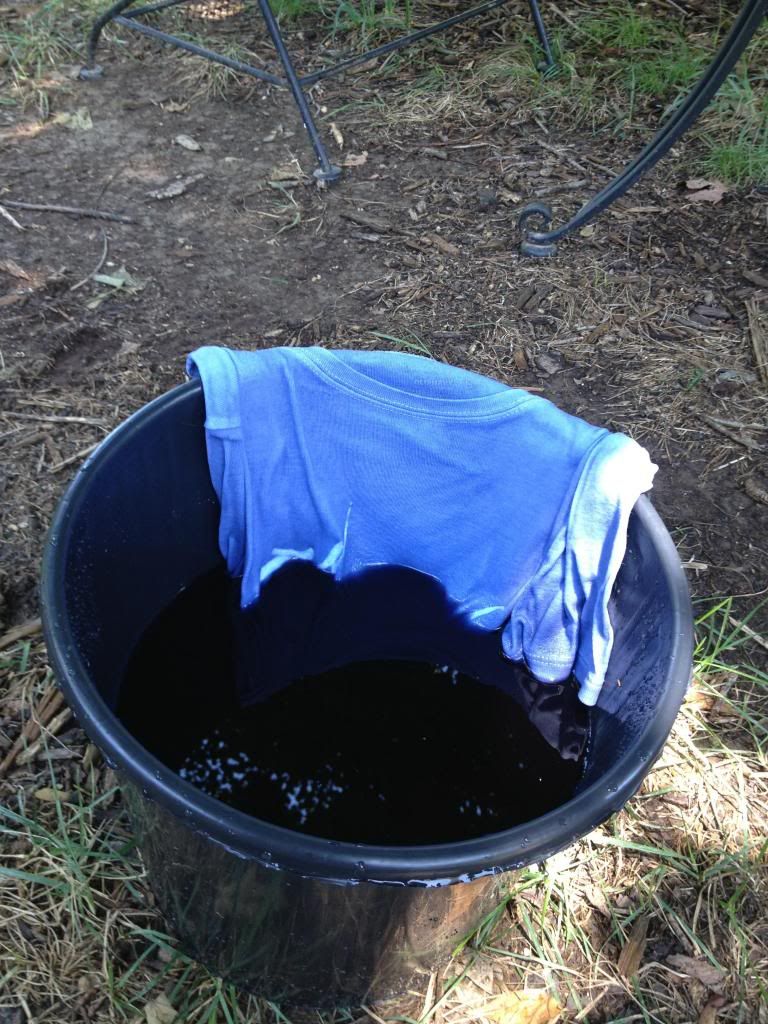
I was trying to achieve a gradient look-- where the bottom is darker than the top of the shirt. I was surprised how quickly the shirt took the dye, and how much the dye bled. If you want to do a gradient I would advise not even dying the top of the shirt-- most likely the dye from the rest of the shirt will bled anyway. I eyeballed how long each section should be submerged.
Step Four:
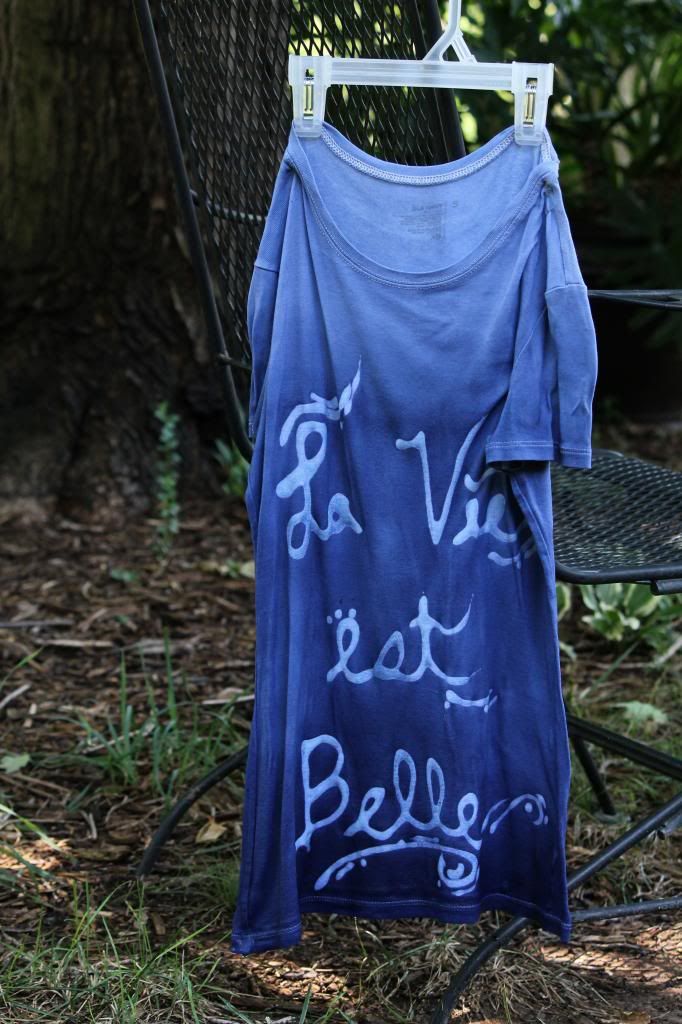
So this was the best my shirt looked the entire project. You can see the gradient, and the words stand out. Let your shirt completely dry-- it can take a long time!
Step Five:
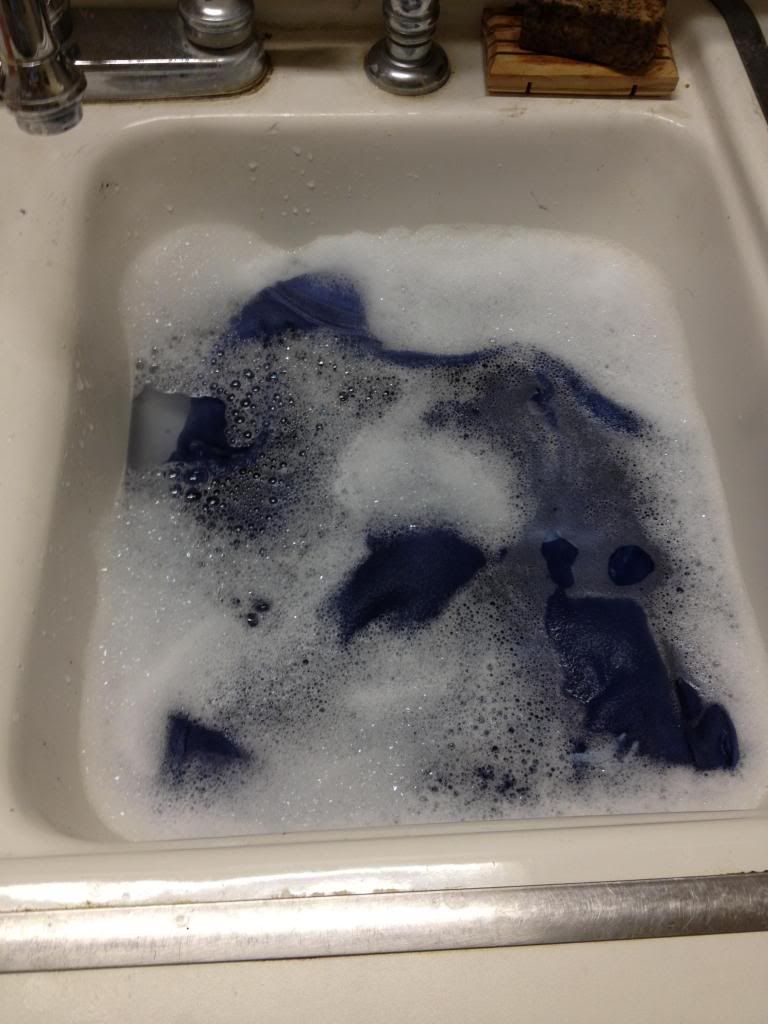
Most of my dye seeped out in this step, but it's a necessary one. Once your shirt is dry, put it in some warm soapy water to get rid of the glue. This will also get rid of all the dye that isn't fully set. Unfortunately, a lot of dye bled from my shirt, getting rid of the nice gradient I had created. This step took the longest-- probably around 30 min of constant washing. I couldn't put it into the washing machine until I was sure that it wasn't going to bleed anymore.
Once you are sure the shirt is done bleeding, stick in the wash.
Step Six:
Et, volia! T'es finis! That's it! The rest of the glue should have washed from your shirt, leaving you with a cheap, customizable t-shirt!
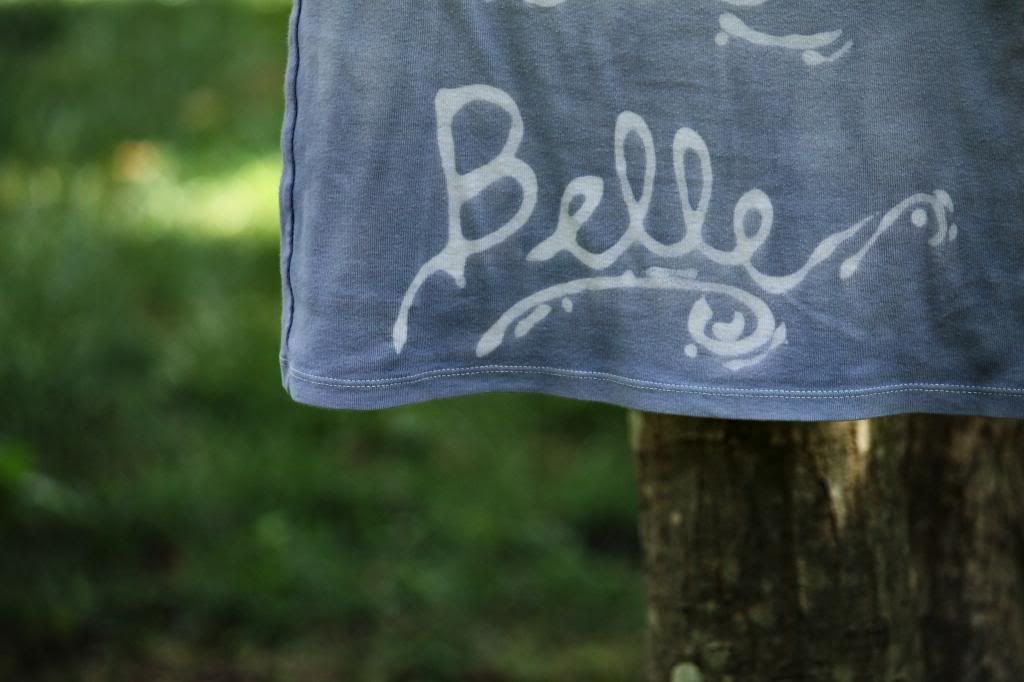
So this wasn't my favorite technique, but it did turn out decently. I'm excited to try it again, tweaking some steps, and seeing if it turns out any better. If so, I'll post an update :)
Thanks, as always, for reading!